Trees are Susceptible to Stressors from Extreme Weather Conditions
By Marty Morgan, Wise County Agriculture Agent
Well, here in Wise County and all over North Texas, we have been experiencing trees of many types that are dead or dying.
On a weekly basis I witness trees like post oaks, red oaks, cedars, cypress, juniper spruce, ash and pines that are succumbing to environmental stressors which can, and most often does, lead to secondary stressors like disease and insects. I conduct many site visits each week looking at trees in decline.
Trees have a vascular system called phloem and xylem. These vascular tissues transport nutrients up and down the tree. Xylem transports and stores water and water-soluble nutrients in vascular plants. Phloem is responsible for transporting sugars, proteins and other organic molecules in plants. Some diseases plug the entire flow or partial flow which can choke the life out of the tree. This happens in live oaks with oak wilt, oak decline or sudden oak death in our post oaks. Another great example of interruption in the flow is what we talked about last month, Hypoxylon canker. If you have not read that article in the Wise County Messenger, you should do so.
Insects on the other hand do not stop the flow but they can transmit and infect the vascular tissues with lethal viruses and bacterial pathogens. With several consecutive years of harsh weather conditions throughout Texas, including extended hard freezes, droughts and heatwaves, North Texas trees have become vulnerable to secondary threats. And we have seen this play out to a larger degree over the last few years. These threats — mainly for cedar, spruce and pine trees — include bark beetles or borers, cedar or pine needle blights and rust fungi. Also there are Ips engraver beetles and others, many types of borers, and of course the deadly fungus like Hypoxylon canker have brought forth significant mortality to mainly our post oak trees. Red oaks and other types are not immune from attack.
Trees experience threats like insects and diseases regularly, and when a healthy tree encounters these stressors under positive conditions, they can show little to no negative reaction to the threat. However, environmental conditions such as droughts, extreme winter weather and new construction development close to the tree can add primary stress.
As the trees encounter prolonged stress under these factors, they become more susceptible to secondary threats. For example, we are still experiencing stressors from the severe droughts of 2011 and 2014-15 as they are still oppressing the surviving trees today. Experts say that our trees are under such severe stress that it takes one little additional factor like a cedar bark or pine beetle to push the tree into mortality. I can give a witness to that as I receive many calls each week about dead trees. Cindy and I are also victims and have lost many of our big, tall pine trees as well as many Post Oak trees on our property. I was doctoring them with everything under the sun, but nothing worked. I believe the experts are correct, there is no cure for Hypoxylon canker, and that’s a fact. And once you see beetles, it’s too late to treat. There is usually no hope for the pine or cedar trees survival. Symptoms of beetles in pine trees include discolored crowns, dying branches and numerous white-to-reddish brown pitch tubes on the bark. Symptoms of cedar bark beetles occur in cypress and juniper trees and include the discoloration and dropping of leaves; twig and branch decline; and small exit holes present on the bark of trunk or limbs which are sometimes accompanied by “sawdust” around the boring or tree. Adult cedar bark beetles are approximately the size of a grain of rice with cylindrical bodies and a reddish colored back.
Management Tips
Insecticides are used as drenching preventive sprays on the trunks and larger branches. These insecticides need to be applied prior to adult beetle infestation. (Remember that overwintering beetles begin emerging in spring as soon as daytime temperatures consistently reach 50-60 degrees.) However, timing can be difficult to determine since bark beetles can have multiple, overlapping generations and life cycles. Adults have been observed entering trees during warm days as early as late-February on through November. Because of this extended activity, two treatments (early spring and summer) may be needed to protect trees during high-risk conditions. Insecticides used to prevent bark beetles include either permethrin, bifenthrin, or carbaryl (Sevin) as the active ingredient.
There are many products currently on the market containing these active ingredients. Follow the manufacturer’s recommendation for the proper rate for bark beetle treatment. Bark beetle applications at the labeled rate should provide at least three months control of these beetles. When a preventively sprayed tree later dies of beetle attack, it is usually for one of the following reasons: 1) the tree was sprayed after it was attacked; 2) the spray was applied at too diluted; 3) the entire bark surface of the susceptible part of the tree was not sprayed; or 4) the material wore off and was no longer effective. I am by no means endorsing or promoting any of these products mentioned here, but I want you to know about them so you can make an informed decision. There is Bio Advanced Tree and Shrub Protect and Feed. It comes in granular or liquid form and the granular is easiest to apply but seems to be more expensive than the liquid used as a drench around your tree. Besides feeding your tree it also provides season long control, so do it in the early spring and forget about it until fall, unless you see a problem appear before then. There are other similar products you can use too that are Systemic Tree & Shrub Insect Drench and granules with most of them having the same active ingredient of Imidacloprid at different percentages which protects plants for 12 months, and the solution is absorbed through the roots, so protection won’t wash off due to rain or regular watering. Another product with the same ingredient is Merit which also comes in granules or liquid. Any product with the active ingredient of Imidacloprid is great treatment but be aware that it can and will kill honey bees, especially if sprayed on blooming plants. That is what I like about these systemic insecticides you can put in the soil and then it is taken up through the roots for less exposure.
If you have any questions please be sure and contact me or visit our website at wise.agrilife.org.
Hypoxylon Canker Answers
By Marty Morgan, Wise County Ag Agent
Hypoxylon canker is a disease that appears as a dead lesion on limbs, branches, and trunks of affected trees. The canker develops just under the bark and in advanced stages, causes a white rot decay of the sapwood. This decay contributes to tree mortality, compromises the structural integrity of the tree, and makes it a danger to life and property.
Cause of:
Caused by the fungus Hypoxylon atropunctatum, hypoxylon cankers attacks hardwood trees such as oaks and pecans. It causes infected bark to slough off the pecan tree revealing a powder-like reddish substance on the wood. Infected wood will develop a brownish black crusty growth while infected trunks and limbs die. Water-stressed trees are susceptible to this fungal disease and — once infected — there is no control available. Maintaining proper care of the pecan tree, preventing soil compaction and protecting wounds by painting over them will help prevent hypoxylon canker.
The Biscogniauxia (Hypoxylon) atropunctatum fungus is an opportunistic pathogen, meaning it does not affect healthy and vigorous trees. However, Hypoxylon can quickly colonize weakened or stressed trees, occurring on trees growing in many habitats, such as forest sites, pastures, parks, green spaces, and urban development areas. Hypoxylon canker can affect any type of oak, including black, blackjack, laurel, live, post, southern red, Texas red, water, and white oaks.
Environmental Factors. Hypoxylon is a fungus and its spores spread from diseased to healthy trees. Opportunistic fungi, usually already present on many trees, cause disease when the tree’s resistance is insufficient to prevent the fungi from infecting it. Many sources of stress can decrease resistance to opportunistic pathogens.
Urban Development. Many factors in urban environments stress trees and can set in motion a chain of events that leads to stress, decline, and tree death.
- Construction damage wounds roots and causes site disruption that results in tree stress and decline.
- Construction of driveways, patios, sidewalks, and swimming pools can damage essential roots and root flares that provide necessary water and minerals for a healthy tree.
- Soil compaction and adding fill soil causes drainage issues and suffocates roots
Natural Factors. Climatic conditions such as drought, flooding, hail damage, heat, ice storms, and lightning can predispose trees to Hypoxylon infection. Insect attacks and other diseases such as oak wilt and root rots also induce stress and make a tree susceptible.
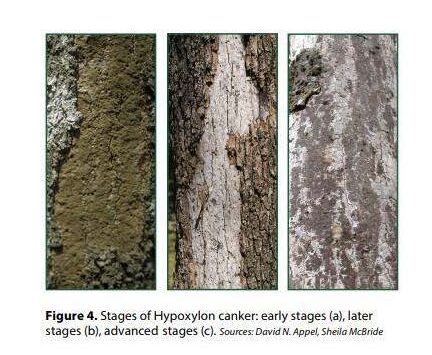
The signs of the fungus are:
- Early stages – Light to dark reddish-brown to olive-green crusty fungal (stroma) tissue over the cankered area (Fig. 4a)
- Later stages – Grey surface that eventually flakes off after 6 to 12 months to reveal a dark brown to black crusty material that gives the tree a burnt appearance (Fig. 4b)
- Advanced stages – Small patches a few inches long that will eventually merge into large strips along the trunk and major limbs of the tree (Fig. 4c)
Once Hypoxylon canker is evident, it is usually too late to try to save the tree. Large portions of the tree will be dead, reducing its desirability as a landscape specimen. The structural integrity of the wood is also compromised, and the tree becomes a hazard. Carefully inspect and consider removing trees with symptoms of Hypoxylon canker.
Symptoms
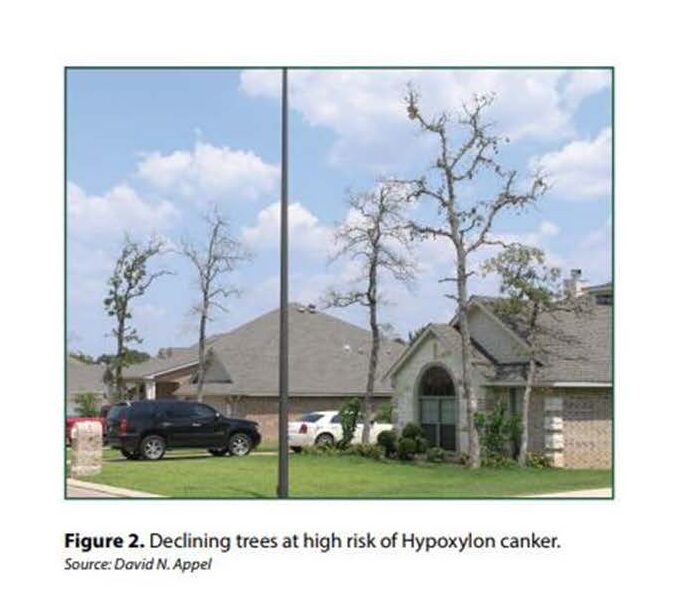
Trees stressed by environmental extremes and in danger of succumbing to Hypoxylon canker manifest symptoms typical of a declining tree (Fig. 2). These symptoms include:
- Yellow, brown leaves
- Small leaves and reduced twig growth
- thinning canopy
- Dead limbs and branches
- Epicormic shoots (water sprouts) growing on trunks and large limbs
- Dieback of feeder roots
- White and stringy sapwood in the cankered area
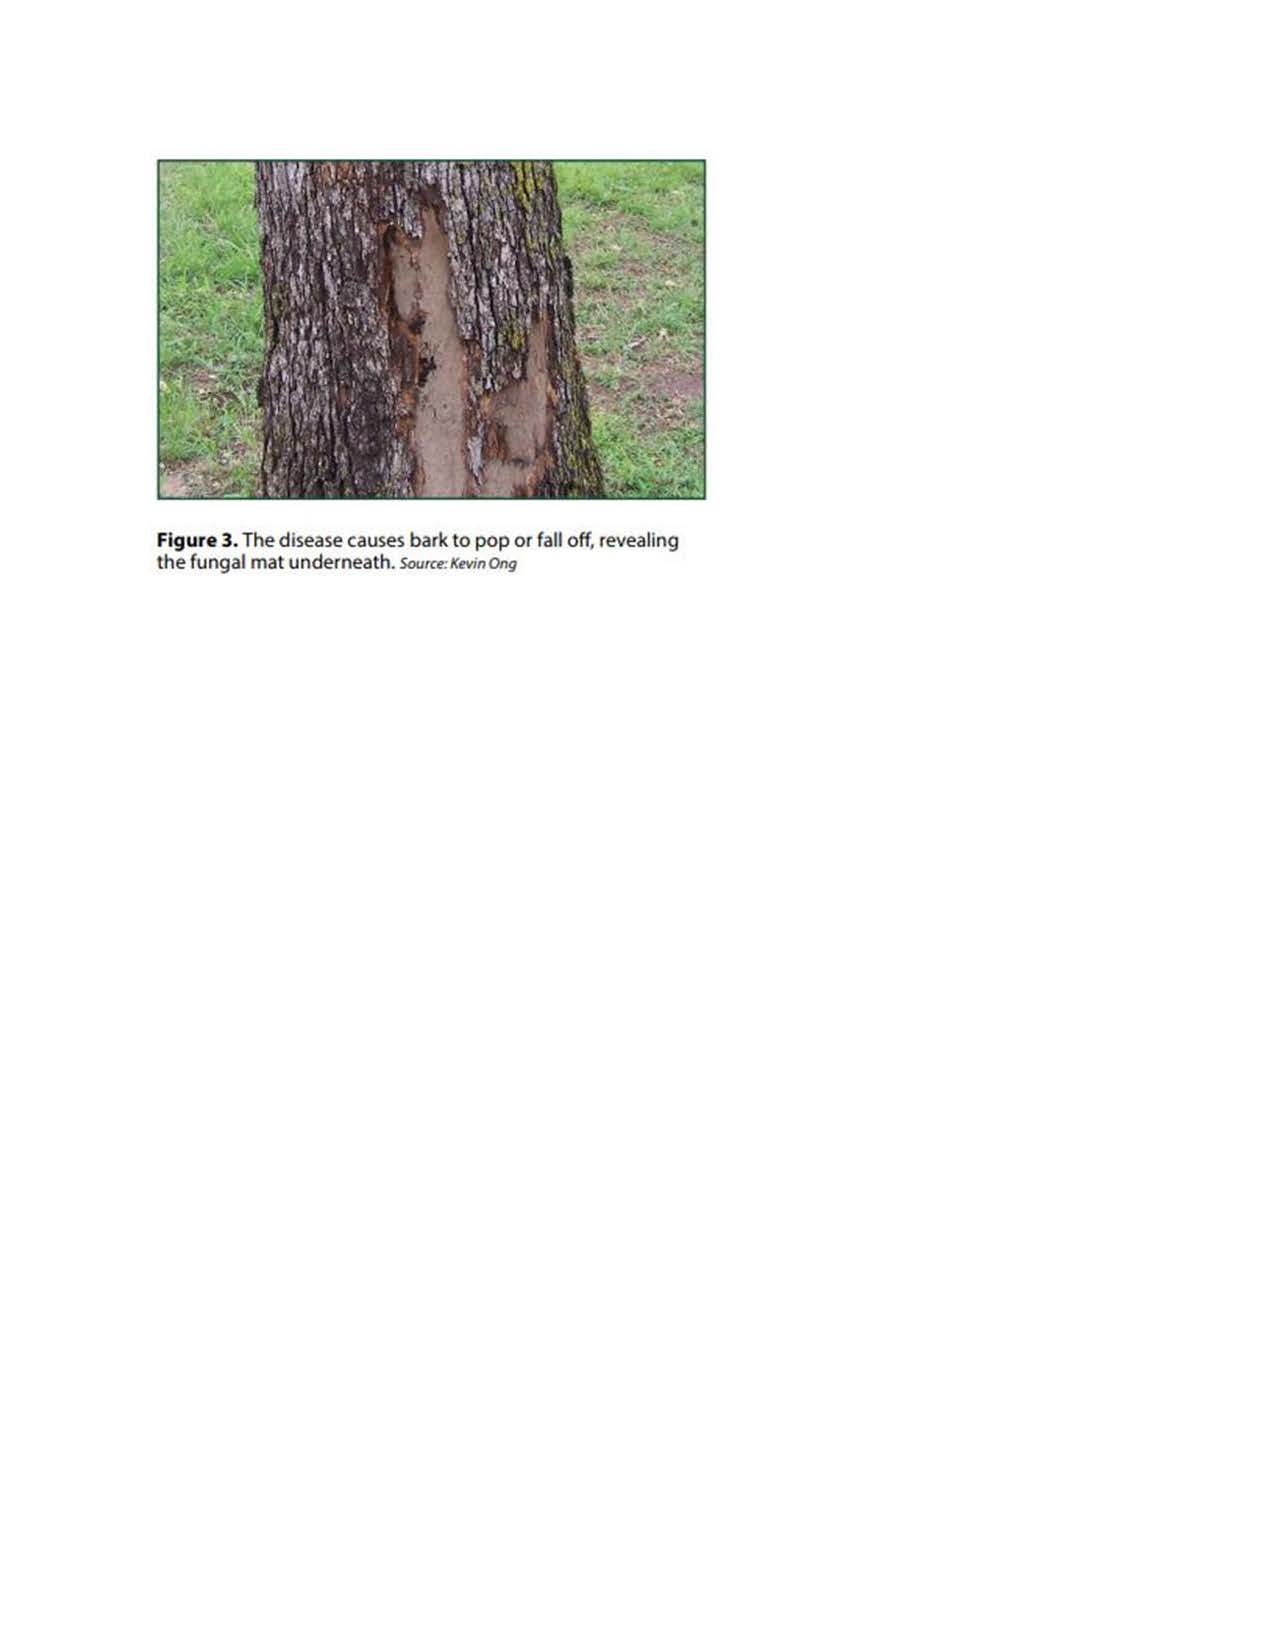
As these symptoms progress, the outer bark falls from the tree to expose the fungus, Biscogniauxia (Hypoxylon) atropunctatum, that causes the disease (Fig. 3).
Control
Managing the disease depends on maintaining vigorous, healthy trees, preventing the factors that lead to stress, and allowing the tree’s natural resistance mechanisms to inhibit the pathogen. If a tree succumbs to stress, take measures to reverse the condition before the pathogen can invade. Remedial action should maximize the regeneration of the root system and allow the tree to cope with the subsequent strain.
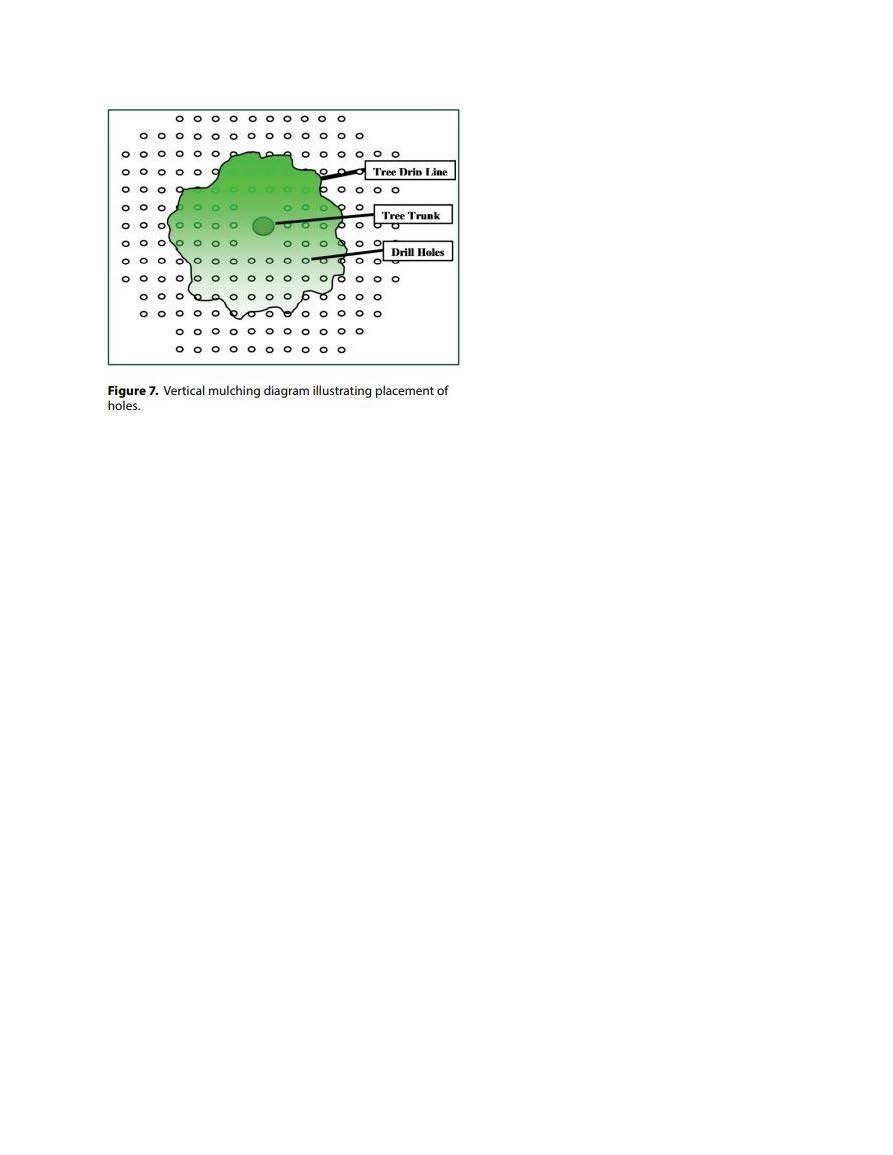
Vertical Mulching. An aggressive way to improve the soil environment and stimulate feeder roots is through vertical mulching. In addition to fertilizing and root zone aeration, vertical mulching increases gaseous exchange in the root system. It also lessens damage from excessive water, provides necessary aeration during wet periods, allows water penetration during drought, and promotes the formation of fine feeder roots. With vertical mulching, a porous matter such as pea gravel, sand, or a mixture of compost with pea gravel, rice hulls, or sand is added to holes drilled throughout the root zone of the tree (Fig. 7). The holes should be 18 to 24 inches deep and a few inches in diameter.
Remedial Pruning. If 15 percent or less of the canopy is affected, use proper pruning practices to remove all dead branches. If specific branches are infected, carefully remove those branches, making sure to remove all of the infected tissue. Sanitation pruning consists of cutting an infected branch 8 to 12 inches below the visible injury or canker. To avoid spreading pathogen during pruning, sanitize the pruning tool before each cut with a 10 percent solution of bleach (one part bleach to nine parts water). To prevent rust, dry and oil tools after use.
Tree removal. If more than 15 percent of the canopy is infected, consider cutting the tree down. B. atropunctatum causes a white rot of the wood and trees killed by it may quickly become a hazard. Since the fungus is already present throughout a stand, destroying the wood to prevent further infections is questionable. Avoid storing diseased wood in the immediate vicinity of remaining trees.
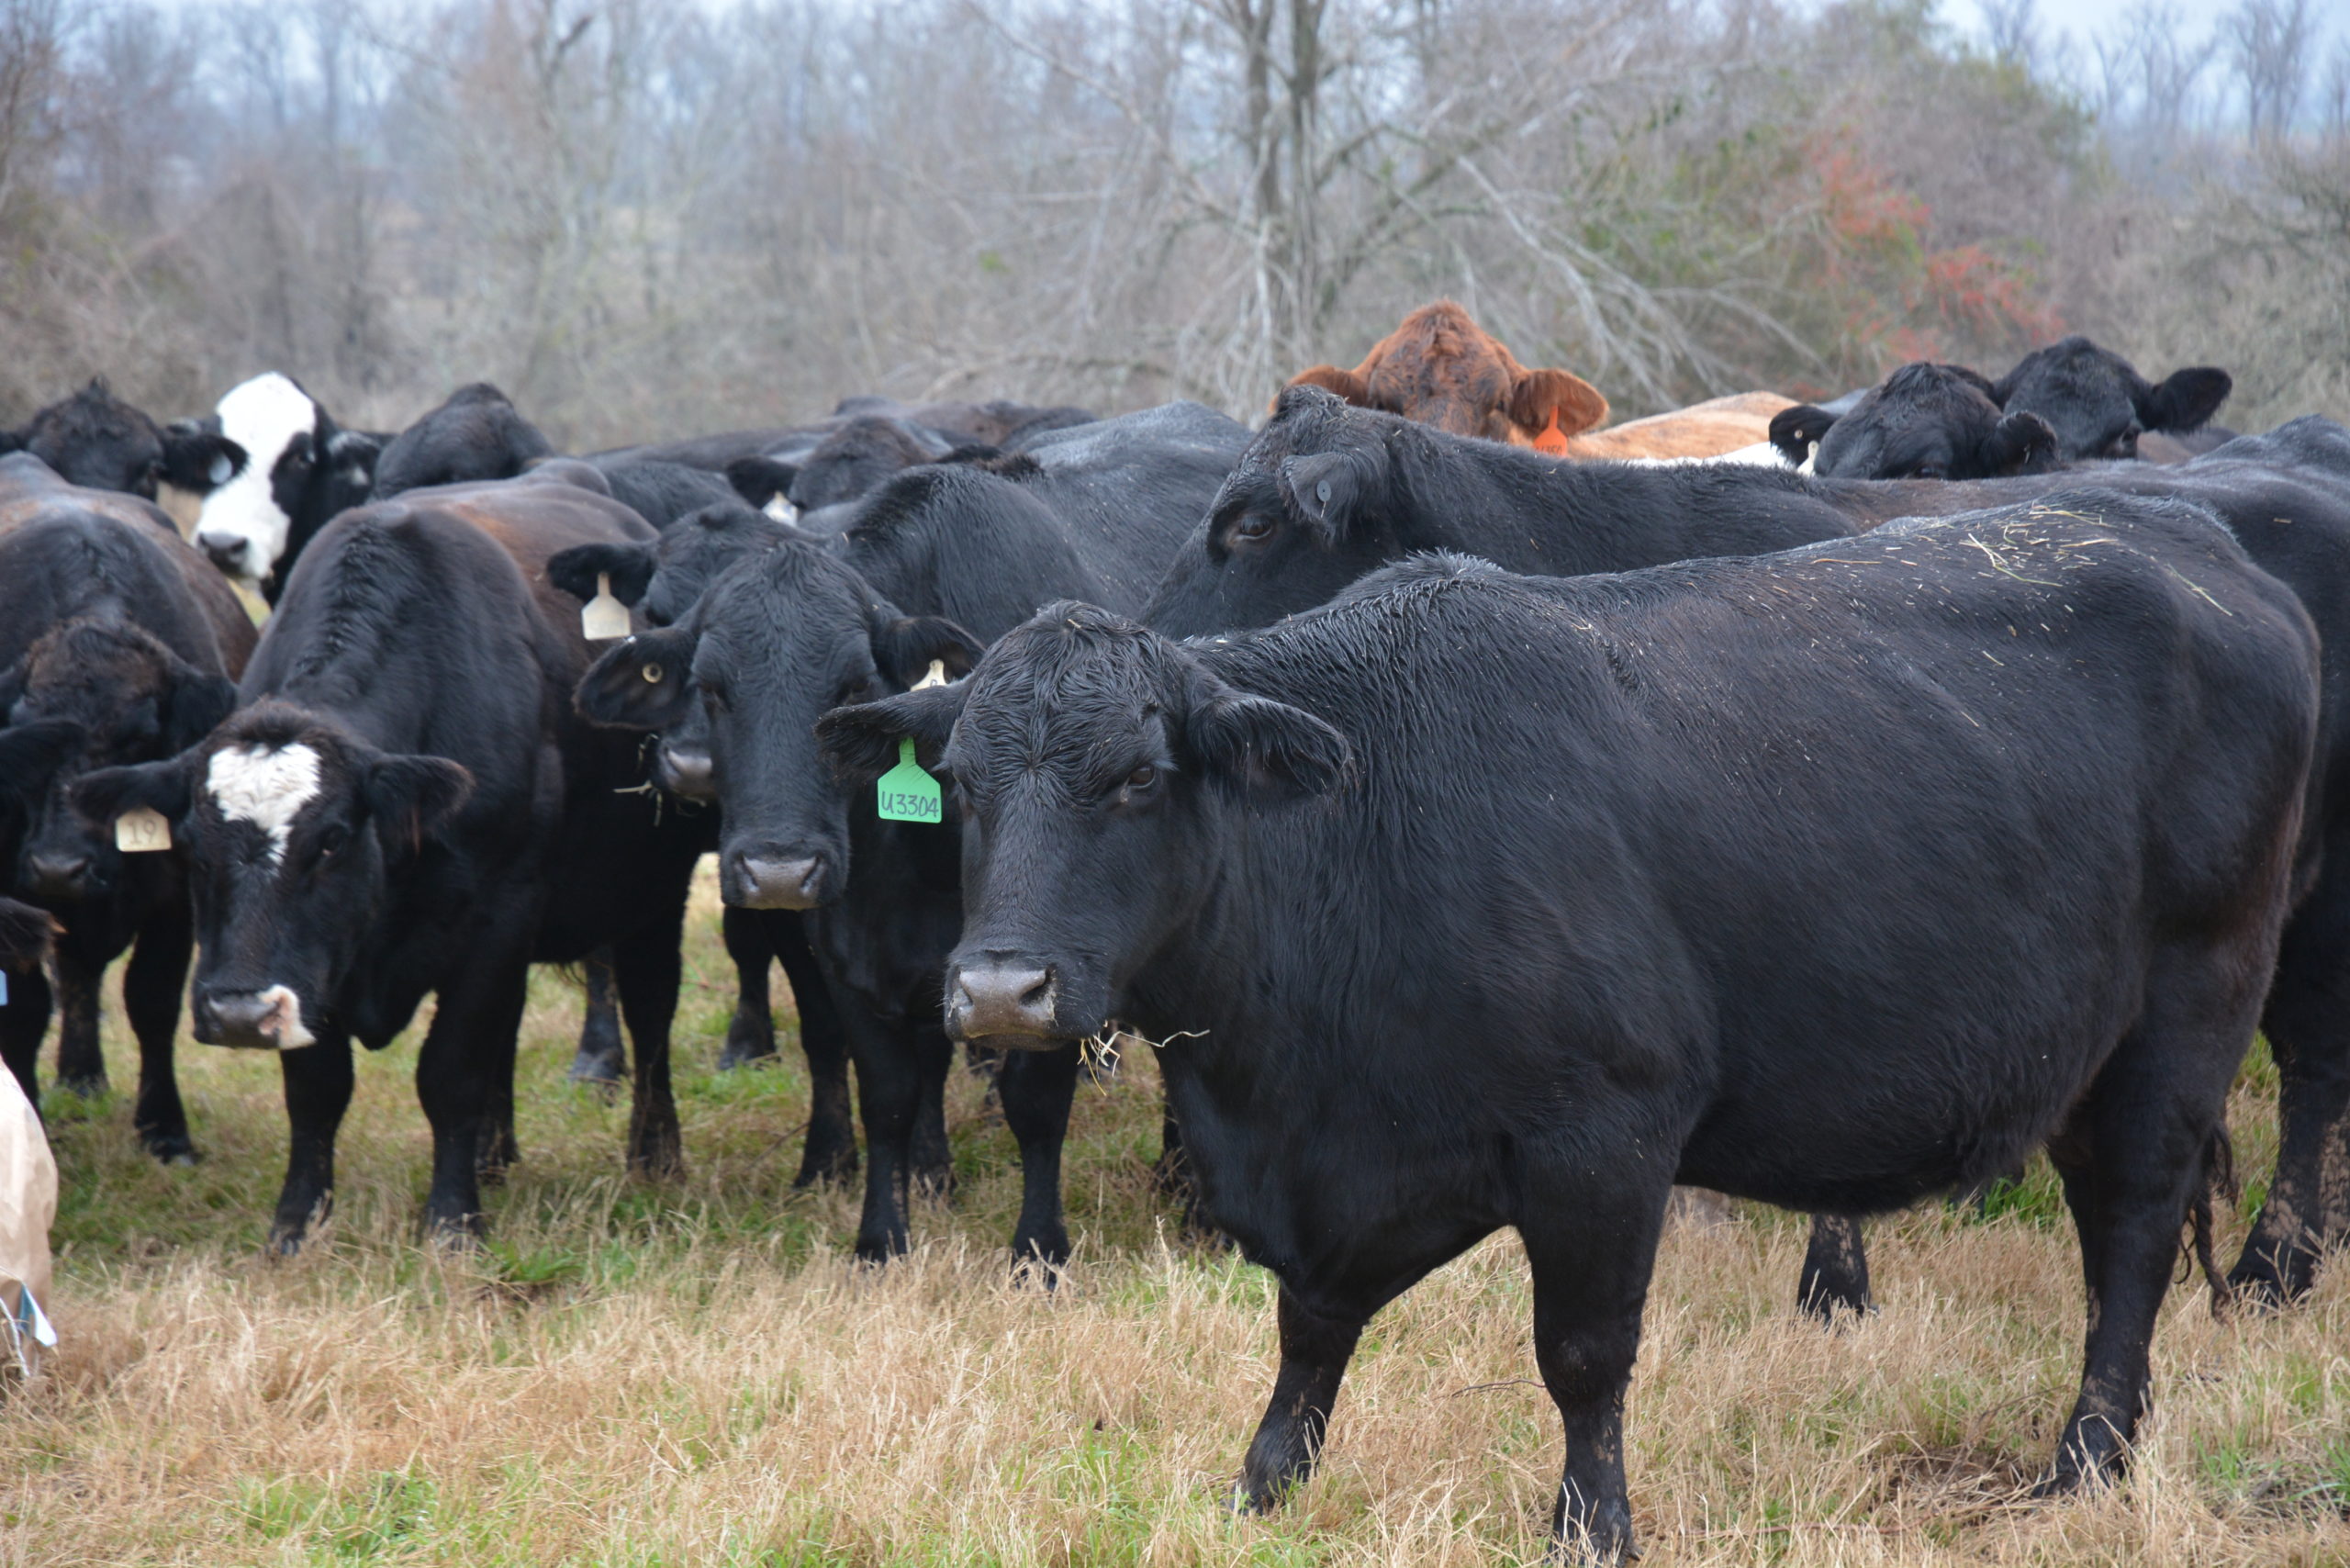
Do My Cows Really Need a Supplement this Winter?
By Marty Morgan, Wise County Ag Agent
Well if needed, we are all looking for the best supplement to get our cows through the winter without adding extra labor or breaking the bank. First if you have not tested your hay then how do you know what and how much to supplement. Get your hay tested! You might be pleasantly surprised that you need very little if any extra protein and energy for your cows this winter. If your hay test at least 8-10 percent protein and 54-58 percent energy (TDN) your good to go, and no use wasting money on expensive supplements of any kind except for a good mineral which you should be keeping out most of the year, regardless. You can adjust the pounds of hay fed per head based on the nutrient requirements for pounds of dry matter and the cow’s stage of gestation. Of course, dry bred cows require less nutrients than a cow with a calf on her side. For example, depending on cow weight, on average a dry 1100-pound cow will need 22 lbs of dry matter/day and 1-1.5 lb of crude protein(CP) and 12-13 lbs of energy(TDN). Feeding 22 lbs of a hay testing 8% CP and 54%TDN, the hay will supply 1.76 lbs of CP and 12 lbs of energy, your good, no supplement needed. If that same cow were nursing a calf say 90 days postpartum, of course she would require more dry matter intake, approx. 32-34 lbs of DM/day, and her CP and TDN requirement will also increase to 2.5-3 lbs and 16-18lbs/day, respectively. Feeding 34 lbs of that same hay would deliver 2.72 lbs of CP and 18.36 lbs of TDN. Again, her requirements are being met by the 8% CP and 54% TDN hay. So, you see without testing your hay you don’t have a clue if her daily nutrient requirements are being met, and how much to supplement if needed. Forage test are cheap and very useful in determining cattle nutrition levels in feedstuffs, and well worth the effort. When I was in college my favorite subject was Animal Nutrition-Feeds and Feeding, and I had a good professor that was an X Army Ranger when he was a young man in the Army. He was tough, rude and downright arrogant, but he was a great teacher, and he knew his stuff when it came to Nutrition. He always said “you have to know what’s in your feed, if you don’t, you’re losing” He was talking about all feed stuffs including forage. So do a simple forage analysis and know what’s in your hay. Other wise you may be feeding an expensive supplement and wasting money, OR you may need to be feeding a supplement and cheating your cows. One more piece of advice is when you do need a protein supplement, base your choice on the cost per pound of actual protein. For example say a 20 percent cube cost $350 per ton bulk. One ton would equate to 400 lbs of actual protein (2000 X 20%), and the cost per pound of protein would be 87.5 cents ($350 divided by 400 lbs of protein). So, what would 38% cubes cost? One ton of 38% would have 760 pounds of actual protein (2000 X 38%) At a cost per ton of $500 bulk, these cubes would cost you around 66 cents ($500 divided by 760 lbs) per pound of protein. That’s a savings of 21.5 cents per pound which equates to $430 per ton. These are estimates but you get the general idea that the lower protein feeds costs the least amount of money per ton, but the most amount per pound of protein fed. If you don’t have time or the equipment to feed bulk cubes and want something you can leave out in the pasture free choice, you might consider Protein tubs or blocks. Some folks like liquid feed, I don’t. See my article “Are Protein Tubs Good for Cattle?. Whatever you feed, whatever it cost, at least put the pencil to it and see where you can save money and still provide the best product possible to your cows.
Basic Care Ensures Calving Success
By Heather Smith Thomas
There are a lot of factors that go into a successful calving season, but the work is worth the effort. A strong, healthy calf can grow and move through the marketing chain, doing its job for everyone involved, or return to the herd as a replacement female prepared to be around for a good while.
For profitability in a cow-calf enterprise, cows should be fertile and healthy, with almost all of them pregnant at the end of breeding season. The next step is having all those calves born alive and healthy.
The riskiest time in a calf’s life is birth. In a Montana study some years back, 68% of calves that died were lost during their first three days of life, and 66% of those losses were due to problems associated with birth. These losses can be minimized with genetic selection and good calving management — assisting a cow or heifer if needed.
Being able to recognize normal stages of labor and timing that progress help you judge whether or not a cow or heifer needs help. It’s important to know how long, and in what circumstances, to leave her laboring, and when to help her or seek veterinary assistance.
Don’t intervene too soon, before the cervix is dilated, or you may injure her by pulling the calf through that narrow opening.
If you pull too soon and too steadily, a partially opened cervix tends to be pulled out of place, like a sleeve—pulling it cone-like ahead of the calf and restricting the diameter. A too-strong pull may tear it. The cervix opens as the calf presses intermittently on it with each contraction; a hard, steady pull on the calf can delay this process.
Once the calf is in proper position and the cervix nearly fully dilated, there’s no point in waiting if it’s taking too long to come through. The calf is subjected to pressure from uterine contractions and the constricted area in the birth canal.
Each time the cow strains, her abdominal contractions put pressure on and constrict the blood vessels to the uterus, resulting in diminished oxygen supply to the calf.
If this goes on a long time, the calf may be born weak, unconscious or dead. If it’s born in cold weather, it won’t be able to shiver to keep warm if his muscles are short on oxygen, and it’s more at risk for chilling. A calf that spends minimal time in the birth canal is lively and strong, getting up more quickly to find the udder.
If nothing shows after a cow starts straining, check her to see if the calf is being presented normally or not, or is too large to be born. It’s healthier for both cow and calf if you can assist before the cow is fatigued and the calf compromised by being in the birth canal too long.
It’s time to check her if she’s been in early labor more than six to eight hours; straining hard for more than one hour, with nothing showing; if the feet show when she strains and then go back in; if the amniotic fluid has turned brown; if the calf’s feet look upside down or only one foot appears; or if progress has halted.
Your assessment will help you know whether to give the cow more time, call the vet to correct a problem, or go ahead and pull a calf that’s started into the birth canal in proper position but is coming too slow because it’s big.
Courtesy of Cody Creelman
Often, the person on calving duty can help with a tough delivery. But sometimes, it’s difficult enough to need a veterinarian. Here, Canadian veterinarian Cody Creelman checks the progress of a hard calving. If you have to pull a calf, pull when the cow strains. Don’t pull steadily — it can be harmful to both cow and calf.
Decide whether it can be safely pulled or if you’ll need your vet to do a C-section. When the calf’s head is starting through the cow’s pelvis, if there isn’t room to force your fingers between his forehead and the pelvis, it won’t fit.
If you can’t determine the calf’s position or have tried for 30 minutes to correct a problem and are unable to correct it or extract the calf, call your vet — unless you are making progress. Don’t spend too long in futile efforts, or it may be too late for the calf after you decide you can’t get it delivered.
Other instances in which you should call the vet are if you discover a tear in the birth canal or uterus; if there are abnormal aspects of the calf, such as forehead too large, fused joints — legs unable to flex to maneuver into the birth canal; or some other problem that would hinder birth progress.
Newborn calf care
If you had to assist a birth, make sure the calf is breathing, gets up quickly and finds the udder. After it starts breathing, treat the navel (umbilical cord stump). If the cow calved on grassy pasture, there’s less chance for bacterial infection; but if she calves in mud, manure or a dirty barn stall, or if you had to bring her in from pasture to assist the birth, there’s risk for infection.
Head it off by dipping the cord stump in tincture of iodine or chlorhexidine. Iodine kills pathogens and serves as an astringent to help the stump dry more quickly and seal off.
Dip the entire cord stump in a small container, making sure it’s fully saturated. If the cord broke off long and might drag the ground, break it to make it shorter before immersing it, leaving just a 3-inch stump. Have clean hands, and pull it between your hands. Never create a jerk on the calf’s belly.
One application of iodine may not be enough to dry the stump quickly. You may have to repeat the process during the first 24 hours. Bull calves take longer for the cord to dry, since they often urinate lying down, keeping the navel area wet.
Make sure every calf nurses soon after birth. Calves born easily and naturally on pasture, with good mamas, generally accomplish this. If weather is cold or the cow doesn’t mother the calf, or if the calf is compromised by a difficult birth and doesn’t nurse on its own, restrain the cow and guide the calf to the udder; or feed it by bottle (or stomach tube or esophageal feeder if it can’t suckle).
The cow’s first milk is crucial to the health and survival of the calf. Most calves that become ill and die later did not receive adequate colostrum. Colostrum provides energy and generates body warmth in cold weather, and acts as a laxative to help the calf pass its first bowel movements.
But most importantly, it contains key antibodies against disease. Some of these are absorbed directly into the blood and lymph systems, passing through the intestinal wall if the calf nurses soon enough.
These help fight systemic infections and give temporary immunity to common diseases, and attack pathogens like pasteurella, streptococcus or salmonella that might cause septicemia. Other antibodies stay in the gut to attack any scours-causing pathogens the calf ingests.
If the cow had strong immunity to various diseases — you kept her on a good vaccination program before calving — antibodies in her colostrum provide immediate protection as soon as the calf nurses. It does no good to vaccinate the cow against scour-causing pathogens if the calf doesn’t nurse within a few hours of birth.
Its ability to absorb antibodies into the bloodstream begins to lessen as soon as it’s born; by 4 hours of age, it’s lost 75% of that ability. If it takes longer than an hour to nurse, help it nurse its dam, or provide substitute colostrum from another cow or a commercial product.
It’s wise to have frozen colostrum for emergencies. Commercial substitutes are handy, but not as good as the real thing.
Avoid the Heat and Prussic Acid
Take care of yourself and your animals during a heat wave
By Marty Morgan, Wise County Extension Agent
Well there is nothing like the Texas Heat beating down on you and your animals come summer time. I don’t have to tell you it is brutally hot out there! We should take care of ourselves first, yes, but don’t forget about your animals. They depend on you to think ahead and prevent them from getting heat stress. Let’s talk about us first. To stay cool wear a broad-brimmed hat and loose-fitting, breathable, light-colored clothing and complete more strenuous activities in the early morning hours while temperatures are cooler. Sunscreen is always a good addition to avoid sunburn and overexposure. But two of the most important precautions to take during extreme heat are staying hydrated by drinking plenty of water and avoiding alcoholic and caffeinated drinks. Taking intermittent breaks to cool down inside or in a shady, breezy location is a great idea too. Think of breaks as not only letting your body cool down but also strategy time where you can plan your next efforts. I do a lot of this in my vegetable garden! If working outside with someone, keep an eye on each other, and it gives you someone to complain about the hot weather with. If working by yourself, please let someone know what you’re doing and where, so they can check on you now and then. I say this with authority as I experienced severe heat exhaustion when I was 40 years old. I spent 5 days in the hospital recovering from it! So take it serious, no matter how tough you think you are, your not tough as Texas Heat!
When it comes to our animals (chickens included) we should recognize and avoid heat stress in our livestock or pets. In hot weather, they should always have access to shade and water and cool water is best if available. Heat stress is more severe with high humidity so they can tolerate higher temperatures with lower humidity to a point. When moving or working livestock, check the forecast for the temperature and humidity of the times you will be gathering, working, or hauling them. The Temperature Humidity Index or THI is an excellent resource to ensure the livestock will not experience significant heat stress. The THI is determined using a formula that accounts for both ambient (in the shade) temperature (Fahrenheit) and humidity (%): So I want to reiterate that for gathering, working, or hauling you should check the forecast for temperature and humidity. If working or moving them, and they begin to experience any signs of severe heat stress—such as rapid breathing or open-mouth panting, foaming at the mouth—release them and call a veterinarian for assistance. Try to stay cool out there and contact us if you need more information.
Prussic Acid Answers
There are times of the year that producers need to be concerned about Prussic acid poisoning in cattle on pastures or in hay put up. Prussic acid can occur after stressful conditions such as frost, drought, extended periods of cloudiness or exposure to a herbicide that kills grasses. Any condition that causes stress to the grass has a potential of producing this poison that can kill your cattle. It’s not a common occurrence, but poisonous prussic acids can form in forages like Bermuda, Ryegrass, Alfalfa etc… but is most common in Sorghum’s and Sorghum Grasses like Johnsongrass and Sudan. So I thought I would explain a few things concerning Prussic Acid(PA) and hopefully answer any questions one might have on the subject. I’m sure no authority on the matter but I have dealt with this issue all of my life and want to share my experiences. The first question we need to answer is about grazing cattle in suspect pastures. If cattle are already grazing pastures with Johnson grass present, then the only time I would worry about PA is the first frost. Pull them out of the pasture immediately after a frost for about two weeks and let the PA dissipate, then resume grazing. If you are turning in on a suspect pasture for the first time with Johnsongrass present, turn in a couple of test cows to see if they have a reaction in an hour or two, if not turn in the rest of the herd. Another thing I always did is to fill the cattle up on hay before turn in, which normally always worked. If you are baling sorghum forages or pastures with Johnsongrass, allow hay to cure properly to remove the danger of prussic acid poisoning from hay containing these forages. Usually the PA dissipates in 48 hours or so, so give it 3-4 days to be safe. If you don’t it could still be in the hay you put up and serve out to your livestock.
Prussic Acid Poisoning
Plants can produce toxic levels of prussic acid, especially when stressed during cold temperatures and droughts. Cyanide-producing compounds in living plant cells are converted to prussic acid when cells are crushed or otherwise ruptured. The prussic acid potential of plants is affected by species and variety, weather, soil fertility and stage of plant growth. Prussic acid is one of the most potent toxins in nature. As ruminants like cows and goats consume plant materials containing cyanide-producing compounds, prussic acid is liberated in the rumen, absorbed into the bloodstream and carried to body tissues where it interferes with oxygen usage. When lethal amounts are consumed, animals can die without visible symptoms of poisoning, but bloating is a common symptom seen. Symptoms from smaller amounts ingested include labored breathing, irregular pulse, frothing at the mouth and staggering. If your are baling Sudan, Sorghums or pastures with Johnsongrass, allow hay to cure properly to remove the danger of prussic acid poisoning from hay containing these forages. If grazing, watch cattle closely if you have to leave them exposed to Sudans or Johnsongrass. Of course, you can’t save a dead animal, but those displaying symptoms prior to death can be treated. A proprietary sodium nitrite-sodium thiosulfate combination can be administered and repeated once if necessary. It must be injected intravenously and very slowly. The dosage and method are critical, so keep a veterinarian’s emergency phone number close by. Most animals that live two hours after onset of symptoms are likely to recover, it just depends on how big of dose they get of the Prussic Acid.
Home Fruit Production – Pecans

The pecan is our Texas state tree, being native to about 150 counties and capable of growing and producing in all Texas counties. The tree is popular for landscaping and as a source of nuts. Proper attention to cultural requirements and pest control will help to assure a long and productive life for home pecan trees. They do require a lot of management and care.
Nitrogen Needs
Apply 1 pound (2 cups) of 21-0-0 or 33-0-0 for each inch of trunk diameter in late March before bud break. If the tree produces a very heavy nut set in May, make a second application in late May or early June. Apply the fertilizer broadcast on the surface starting 3 to 5 feet from the trunk and extending out a few feet past the tree canopy. Water the fertilizer into the soil promptly. Avoid scattering fertilizer on sidewalks or paved driveways because some materials can cause unsightly, although seldom permanent, spotting.
Zinc
Frequent zinc sprays are essential for rapid tree growth. Trees deficient in zinc usually have small, weak leaves, highly branched (rosetted) twigs at shoot tips and, in severe cases, die back of twigs and branches. During the first 7 years, trees grow best if foliar sprays of zinc are applied at least every 2 weeks throughout the growing season of April through early August. If the trees are not growing, reduce the spray frequency. Spray mature trees with zinc at least three times between bud break in late March or early April and early June. Zinc is needed primarily by young expanding leaflets. Leaflet expansion on mature trees usually stops by mid-June. Two of several choices of zinc materials to spray are:
Zinc nitrate is formulated as a liquid. Use 2 to 4 teaspoons per gallon or 1 to 2 quarts per 100 gallons of water.
Zinc sulfate is formulated as a powder. Use 2 teaspoons per gallon or 2 pounds per 100 gallons of water. UAN liquid fertilizer (32-0-0) can be added at a rate of 1 quart per 100 gallons of the zinc sulfate solution to improve penetration of zinc into the foliage. Zinc sulfate spray can cause leaf burn on other trees in the home landscape, especially peaches, plums and other stone fruits. Zinc sprays are most effective if applied early or late in the day with little or no wind. The higher humidity under these conditions allows longer wetting and more zinc absorption. Zinc sprays pose a minimal hazard to man and animals, yet care should be taken not to contact the spray directly. Zinc sprays are not likely to stain sidewalks, houses, cars, etc.
Diseases and Insect Control
Pecans are damaged by several insect and disease pests and control measures usually are necessary to mature a good crop. Control measures are detailed in Texas Agricultural Extension publication L-1140 Homeowner’s Fruit and Nut Spray Schedule. A copy may be obtained from your county Extension office.
Large pecan trees can be a problem to spray. Hose-on sprayers are the only type that most homeowners have at their disposal that can spray very far up into the tree, but even these are limited to trees no more than 25 to 30 feet tall. Reaching the top of tall trees requires sprayers that can generate 500 to 600 psi pressure. If you do not have access to a high pressure sprayer, check with a local pest control company. Many of them apply zinc and pest control sprays.
Proper timing of spray applications is important, especially for the pecan nut casebearer and pecan weevil. Spray dates for these insects may vary each year and should be checked with the county Extension office.
Guide to Common Pecan Questions
| Problem | Probable Cause(s) | Solution(s) |
| The Tree | ||
| Tree makes little new growth after planting | Root damage before planting | Replace tree if growth is extremely weak or cut back to a 1 foot stub during winter. |
| Planted too deep | ||
| Moisture stress (too little or too much) | ||
| Fertilizer used in the planting hole | ||
| Spring growth of young tree wilts and dies in late spring or summer. Surviving growth sprouts mainly from base of tree | Freeze damage | Prune out damaged wood. Improve fall hardening. Cut back on fall watering and don’t fertilize late. |
| Older tree with weak growth, small yellowish leaves and twig dieback | Zinc deficiency | Follow fertilizer and general care recommendations. Have roots checked for nematodes. |
| Poor soil | ||
| Crowding | ||
| Poor nitrogen | ||
| Moisture stress | ||
| Grass competition | ||
| Nematodes | ||
| Sudden tree death in the late spring or summer | Cotton root rot (especially summer death of younger trees in alkaline soils) | Replant with adapted species. |
| Delayed response to severe winter freeze | Replant pecans. | |
| Water-logged soil (during winter or current) | Replant with adapted species. | |
| The Leaves | ||
| Trees dripping sugary substance from leaves and black material coating leaves | Yellow aphids feeding on leaves | See L-1140*. |
| General burn of tissue along edges and tips of leaflets | Sprinkler water on leaves | Lower sprinkler height. |
| Too much fertilizer | Reduce fertilizer and water more. | |
| Moisture stress | ||
| Hot weather | ||
| Poor quality (salty)water | ||
| Black spots on leaves. | Disease most commonly scab | See L-1140*. |
| Green galls (wart-like) on leaves or small twigs | Pecan scab phylloxera | See L-1140*. |
| The Bark | ||
| Green or yellowish fungal-like growth on the bark | Lichens | Not a problem, fungicide sprays for nut and foliage disease usually control lichens. |
| Peeling woody bark | Natural part of growth and aging process | None needed. |
| Deep vertical cracks | Freeze injury | Will heal depending on severity of injury. |
| Very fast growth | None needed. | |
| Holes in bark | soodpeckers make cone-shaped holes, usually aligned in rows | Usually not harmful. |
| Borers | Treat with labeled insecticide, may indicate a weak tree from other problems. | |
| The Nut | ||
| Premature nut drop in summer | Poor pollination | Plant pollinator. |
| Insect damage (nut casebearer, weevil, stink bug) | See L-1140*. | |
| Drought stress | Water more often and deeper. | |
| Random patches of dead tissue on the shucks | Disease – usually scab | See L-1140*. |
| White powdery growth on the shucks | Powdery mildew | None needed, not seriously damaging |
| Shuck won’t open, small white worms tunneling in shucks | Hickory shuckworm | See L-1140*. |
| Shuck won’t open, but no apparent insect problem, kernel usually shriveled | “Sticktights” from drought and heat stress in September and October | Water more often and deeper especially in August and September. |
| Fall freeze injury | Grow early maturing varieties. | |
| Round, 1/8″ diameter hole in the shell, kernels eaten | Pecan weevil larvae (redheads) | See L-1140* |
| Kernels poorly filled | Crowded trees | Thin trees. |
| Old trees | Thin trees and/or avoid water and nutrientstress. | |
| Shallow soil | Thin trees and/or avoid water and nutrient stress. | |
| Late summer drought stress | Water more. | |
| Insect damage (especially hickory shuckworm) | See L-1140*. | |
| Nuts are too large | Enjoy for shade as is or graft tree to better variety. | |
| Poor nutrition | Follow nitrogen and zinc recommendations. | |
| Nuts sprouting before harvest | Fall drought stress | Continue watering until harvest. |
| Rains during shuck opening | Harvest as early as possible. | |
| Black spots on kernels | Stinkbug damage | See L-1140*. |
| Fuzzy brown or tan material on surface or kernels | Stress (drought, tree crowding, old trees, shallow soil) | Water more often and deeper. |
Home Fruit Production – Stone Fruit
Fruit trees are widely adapted in Texas. However, success in growing fruit trees and in producing quality fruit doesn’t just happen. Careful attention must be given to basic management practices including site selection, variety selection, weed control, water and pest management.
Fertilization
Fruit trees can be fertilized the first year after they leaf out in the spring. Place the fertilizer at and slightly beyond the canopy edge of the tree but never against the trunk. General recommendations for regularly watered trees are included in the following table.
| March | April | May | June | July | |
| Year 1 | 1 cup1 balanced2 | 1 cup 21-0-0 | 1 cup 21-0-0 | 1 cup 21-0-0 | |
| Year 2 | 2 cups balanced | 2cups21-0-0 | 2 cups 21-0-0 | 2 cups 21-0-0 | 2 cups 21-0-0 |
1One cup of granular fertilizer is equivalent to approximately 1/2 lb.
2Apply balanced fertilizer according to soil test recommendations, or use a common mix such as 15-5-10.
| Bearing trees | ||
| February–2 cups balanced fertilizer per inch of trunk diameter | ||
| May–2 to 6 cups 21-0-0 per tree depending on vigor of shoot growth | ||
| August–no fertilizer if trees are making vigorous growth; 1 1/2 cups 21-0-0 per tree if there is no new growth but healthy leaves; 3 cups 21-0-0 per tree if there is no new growth and leaves are yellow | ||
Note: If your soil pH is above 7.5, do not apply phosphorus fertilizer.
Disease and Insect Control
The best quality fruit is produced when diseases and insects are controlled. Unless an efficient spray program is maintained, it is not advisable to plant stone fruit trees. The most serious diseases are brown rot, scab and leaf curl.
Insect problems include scale, plum curculio, catfacing insects and peach tree borer. The first line of defense is good sanitation. Remove old diseased fruit and wood as it appears on the tree. Your county Extension office has information on timing, methods and materials to control diseases and insects. Many garden centers sell home orchard fruit tree sprays containing an insecticide and fungicide. Applying one of the products according to label directions usually controls most insect and disease pests.
https://aggie-hort.tamu.edu/extension/homefruit/stone/stone.html
https://aggie-hort.tamu.edu/extension/peach/peach.html
What to do in March and April for your Texas Lawn and Gardens
March
- Plant or replace cool season annuals.
- Set out tomato transplants. Once all chances of frost are gone, set out tomato transplants and begin fertilizing.
- Plant new trees and shrubs.
- Fertilize lawn. The secret to a weed-free lawn is a good fertilization program. Avoid “Prune spring-flowering shrubs and vines after they finish blooming.
- Continue fertilizing winter and spring annuals.
- Continue planting cool-season vegetable seeds outdoors. Beets, carrots, collard greens, kale, kohlrabi, lettuce, mustard greens, scallions, spinach, swiss chard, turnips.
- Plant beans by seed outdoors. Bush beans, lima beams, pole beans, and snap beans.
April
- Start planting summer annuals. Lantana, pentas, begonias, vinca, and coleus.
- Plant new perennials.
- Mulch all of your garden beds. Mulch reduces water loss by 50%. It also protects against disease.
- Continue planting trees and shrubs.
- Plant summer vegetables. By seed: corn, cucumbers, squash, watermelon, and zucchini. By transplant: pepper, cucumbers, squash, and zucchini.
When to Plant Potatoes in North Texas
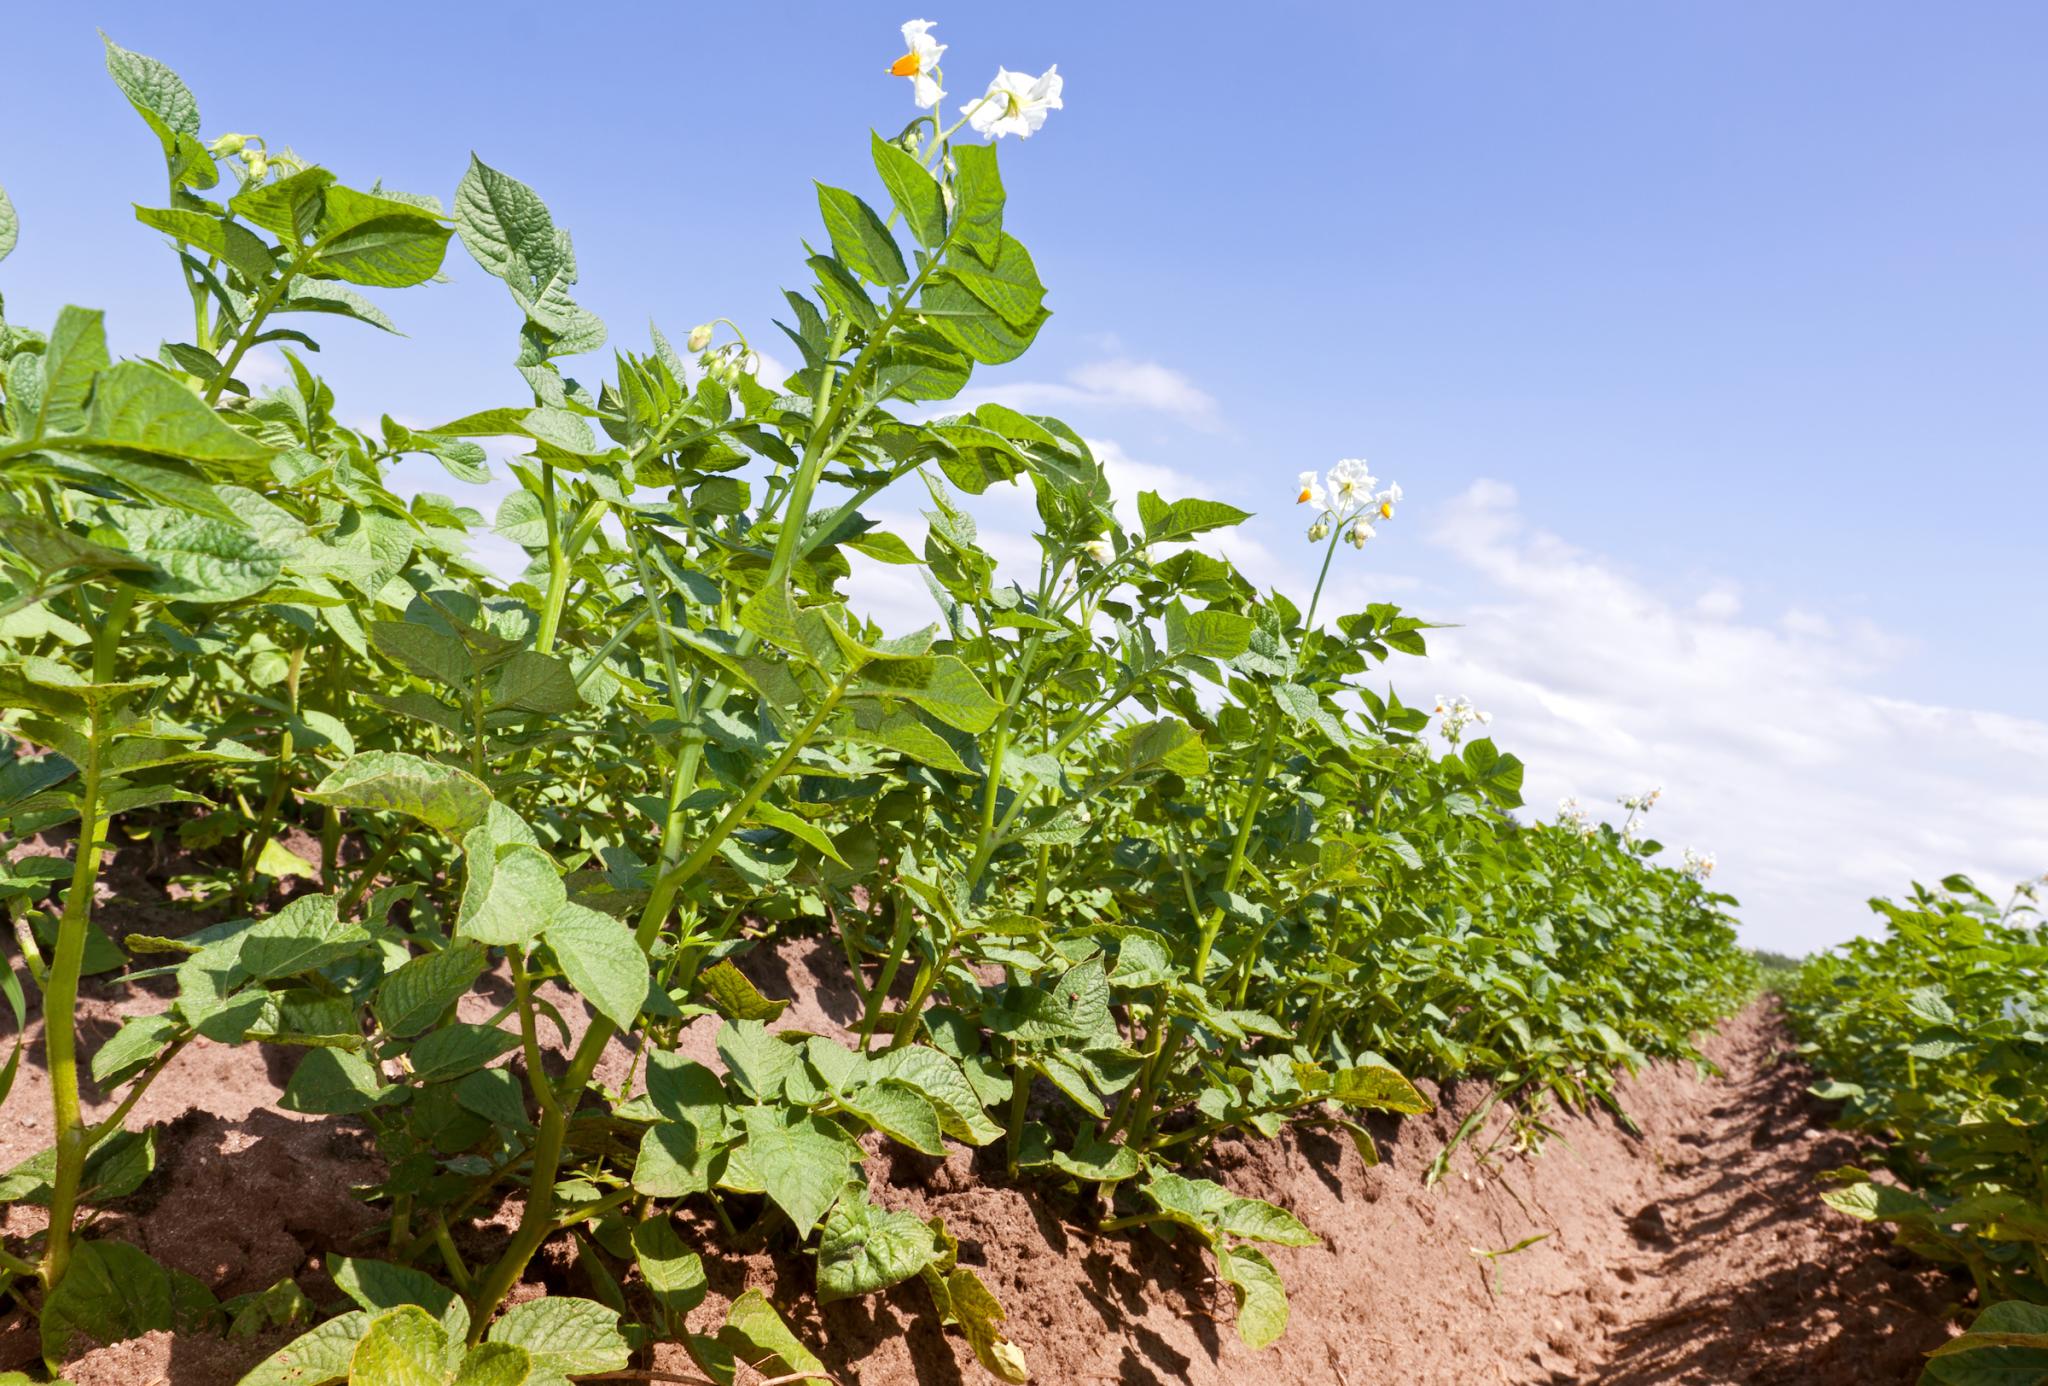
Mid-February through early March is the best time for planting potatoes in North Texas. This gives potato plants enough time to get established before the intense heat arrives.
Where to find “seed” potatoes
Seed potatoes are typically available at local independent nurseries at planting time, but call ahead before visiting to verify that they have them in stock.
North Haven Gardens stocks a large selection of potatoes that perform well in our area.
Avoid buying seed potatoes from home improvement stores. These potatoes typically haven’t been stored properly, and are not likely to be varieties that will do well in North Texas.
Seed potatoes are available from online suppliers, but be careful – many of these suppliers don’t start shipping seed potatoes until March. This is too late for our area.
A follower recently suggested that Hoss Tools ships seed potatoes at the proper planting time.
Recommended potato varieties for North Texas
Varieties that perform well in our area include:
‘Red laSoda’
‘Kennebec’
‘Red Pontiac’
‘Irish Cobbler’
‘Yukon Gold’
Can you plant grocery potatoes?
Many North Texas gardeners successfully plant organic potatoes from the grocery. Make sure to only purchase organic potatoes.
Treat this as an experiment, however, because these potatoes were not grown to be replanted. Also, these potatoes are not certified disease-free.
For the best chances of success, use seed potatoes from a nursery or online supplier.
Preparing potatoes for planting
Small tubers can be planted whole, but larger tubers should be cut into pieces before planting. Each piece should have one or two “eyes”.
After cutting up, dust the pieces with powdered sulfur and the let the pieces dry for 4-5 days to let them callous over. This helps to prevent fungal rot.
How to plant potatoes
Potatoes can be grown in the ground, in raised beds, or in containers. Because the majority of the soil in North Texas is heavy clay, it’s easiest to grow potatoes in raised beds or containers because potatoes need very well-drained soil.
It’s also very important that potatoes get plenty of sun. Plant in an area that gets 6-8 hours of direct sun per day.
In-ground or raised bed planting
- If you are planting in the ground, amend the area with high quality compost before planting. If you have heavy clay soil, incorporate some expanded shale as well. Mix these products in to a depth of 6-8 inches.
- Before planting, mix a balanced, organic fertilizer into the top few inches of soil. I like Micro Life Multi Purpose.
- Space potatoes 12 inches apart, and plant them 3-4 inches deep.
- As the plant grows, mound up the soil around the base of the plant. Potatoes form along the stem of the plant. Continue mounding the soil until the mounds are 12 inches high.
- Add mulch around your potato plants once you finish the mounding process.
Container planting
Potatoes can be grown in regular garden containers or in “grow bags”. For the best results, use a container or bag that is at least 10 gallons. You can plant one seed potato for every 3 gallons of container size.
- Fill container with a good quality potting soil to a depth of 6 inches. (I like the potting soil available at Nicholson-Hardie.)
- Mix a balanced, organic fertilizer into the soil according to directions. I use Micro Life Multi Purpose.
- Place the seed potatoes on top of the soil and then cover them with 2-3 inches of soil.
- Once the sprouts reach 6 inches tall, begin adding more potting soil to the container. The potatoes form along the stem. Continue adding soil as the plant grows until the soil is 2-3 inches below the top edge of the container.
- Cover soil with mulch to conserve moisture.
How to care for your potato plant
Water your potato plants enough that the soil stays consistently moist but not soggy.
Potato beetles and flea beetles pose the greatest threat to your potato plants. To prevent these pests from decimating your plants, do the following:
1. Never plant potatoes in the same place year over year.
2. Dust plants with food-grade diatomaceous earth weekly. Re-apply after it rains.
How to tell when potatoes are ready to harvest
Once the potato plants begin to flower, you can start harvesting the young potatoes, known as “new potatoes”. Simply dig down into the soil and pull them out.
Potatoes are mature and ready to harvest once the tops start to turn yellow and die back. Though each variety will have a different number of days to maturity, start to watch your plants for signs of dying back once they have been in the ground for around 100 days.
Dig gently into the soil, and pull the potatoes out.
If you are growing in containers, gently dump the pot out or turn it on its side and pull out the potatoes.
Storing your homegrown potatoes
Since most homes in North Texas don’t have root cellars, we must take care to store our potatoes in a cool, dry, dark place. If potatoes start to turn green (due to exposure to sunlight), they are inedible and must be tossed into the compost pile.
What To Do in January for Your Texas Garden
 Your brain may be thinking “What! It’s winter,” but January is the time to start prepping your Texas garden for spring. There really is a lot to be done and if you organize your tasks appropriately for the month you can spread out the work and not be playing catch up when spring rolls around.
Sow Your Seeds
If you want to grow from seed, now is the time to start many of your plants indoors. Having a warm greenhouse or cold frame is ideal, but a grow lights or even a bright window sill will work. Growing seeds indoors will just take a bit more day to day maintenance. If you will be using grow lights, be sure to start the seed with the lights a few inches above the soil. As seedlings emerge, you will need to move the lights higher. Seedlings on windowsill will need to be rotated daily so that strong, straight stems will develop. Also, be careful to watch out that bright light doesn’t burn young seedlings. Vegetables you can be sowing now for your spring Texas garden include: Lettuce, Radish, Spinach. And in late January you can include: Beets, Carrots, Collards, Kale, Peas (English, Sugar, Snap), Rutabaga, Turnip, Tomatoes and Peppers.
Annual flowers to sow in January include: Alyssum, Coneflower, Delphinium, Gaillardia, Gayfeather, Hollyhock, Larkspur, Phlox, Petunia, Snapdragon. Late January: Poppies, Sweet Pea.
What Can Be Planted Now
The month of January is a good time to plant bare root fruit. Think about your rich harvest if you consider putting in apples, berries, figs, pears, and pecans. Vegetables that can be planted include cabbage, kale, onion, leeks, spinach, broccoli, cauliflower and collards. There are several annuals that could have gone in during the fall but you can plant them now for spring blooms. Try pansies, violas, alyssum, stock, snapdragons, bluebonnets and dianthus.
Winter is a good time to put in hardy evergreen and deciduous trees. During this time of the year, roots start to grow while the top of the plant is resting and this will give your trees a strong head start. For the most success, plant native trees for your Texas garden. They will be more drought tolerant and will adapt quickly to Texas soils and climate. Consider ash, black gum, buckeye, cottonwood, hawthorn, hickory, magnolia, red maple, oak, pine, or sumac.
Prep the Garden Bed
It’s time to dig in and prep your garden beds so they offer your transplants a ripe, hospitable environment. Till or turnover the bed and amend them with a rich compost. This can be a homemade mix or a purchased product like turkey manure. Adding some cottonseed meal or bone meal to the top two inches will help stimulate root growth for young seedlings and reduce transplant stress.
If you didn’t clean up the beds in the fall, you will need to do this before tilling. Remove all dried vegetation, twigs and any other debris that may have accumulated over the past few months.
General Maintenance
Give your irrigation system a complete checkup. Now is a good time to also make sure that all hoses and sprinklers are in good working order. If you are in drought conditions, continue to water lawn and other plantings. Always water deeply. Plants are subject to freeze damage if they are too dried out.
The warming weather is prime time for weeds to pop up quickly. Corn gluten is a natural pre-emergent that is friendly to Mother Nature and it offers a welcome dose of nitrogen. Keep in mind though that corn gluten will keep all seeds from sprouting so don’t use it in beds where you will be sowing rather than transplanting.
If you have mature fruit trees, spray them with dormant oil. This is an effective preventative for scale and over wintering pests. This is the end of the dormant season so it will be your last opportunity to prune fruit trees before buds begin to appear. You should also trim evergreen hedges and hardy herbs will benefit greatly from a judicious haircut.
Stuff to Consider
If you’ve been thinking about adding to your landscape, consider putting in shrubs and groundcovers at this time. Texas winters are typically mild and an early start means plants will be more robust when hot temperatures arrive.
Now is also the time for putting out seed potatoes. They will be planted in mid-February, but should be cut and put out to dry before plantings. If you’ve had a vegetable garden for a few years, consider a soil test. It will offer suggestions for which amendments are needed to enrich over used soil.
If you want to be the proud owner of a beautiful Texas garden, put down the remote and head to the yard. There’s work to be done and now is the right time to get started.
12-Month Garden Checklist for North Texas_
Gardening-Planting_Dates_for_North_Texas1
Gardening-Vegetable-Planting-Guide
Gardening-Vegetable Companion Planting Chart
Gardening-Veggie Varieties for North TX
Gardening-When What to plant with links
MG-Companion planting chart-10 most common veggies
Great Information on Fall Armyworms and Kahkiweed Control
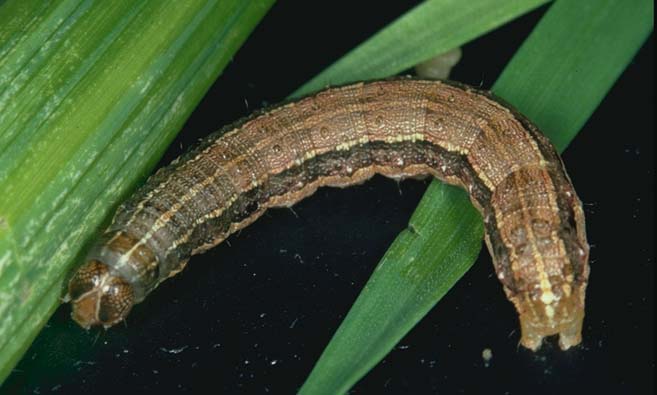 Fall Armyworms
The Fall Armyworm has been reported in Wise County and parts of North Texas. I have assembled some great information on identifying, controlling and choice of products available, so check it out. Remember to identify a Fall Armyworm they will have the inverted Y on their heads and three yellow stripes down their back. If they don’t have that inverted Y then they are True Armyworms and they don’t usually pose as big a problem for our forages. Anyway, here in my toolbox this week with some great information for you to help control and eliminate the little grass hogs. Stay on top of it as they can wipe you out overnight seems like. Get your product out early in the worms life cycle, from pre-hatch to half inch long is best for most products but some does have longer acting control for any stage. That means get out in the grass and look for them on a daily basis if possible so you can detect them early. Small Fall Armyworms are much easier to kill than larger ones. A population of 3 to 4 or more Fall Armyworms per square foot is a reasonable treatment threshold. Insecticides vary in price; grazing and harvesting intervals; mode of action; speed of action; and safety to the environment and to the applicator. The insecticide label usually recommends a range of application rates. In general, use higher rates of insecticides (and higher volumes of water) when the grass is thick, when Fall Armyworm populations are high, when caterpillars are large, and to get the longest residual effect. Some insecticides will kill only smaller caterpillars, so check the comments about each insecticide. Pay close attention to the number of times a particular insecticide can be applied per hay cutting and per season. Within a season, rotate between different modes of action, if possible. I am talking mainly pastures and hayfields here, but they can get in your lawn too so you homeowners beware! What kills the Fall Armyworms will most likely kill grasshoppers with the exception of the Insect Growth Regulators Intrepid 2F.
Products for Pasture or Hay field application: See the our publication – Armyworm Fact Sheet, for a list of products available to use, and restrictions. Page 3
Products for Homeowners on Lawns: See our Publication Weed, Insect and Disease control in Turfgrasses, for a list of products to use, use rates and restrictions. Pages 58-60
As always: Read and follow label directions – the label is the law!
Field Guide to Common Texas Insects Fall Armyworm
Fall-armyworm-identification-and-control
Management of Fall Armyworm in Pastures and Hayfields
Weed, Insect and Disease control in Turfgrass
12-Month Garden Checklist for North Texas_Gardening-Planting_Dates_for_North_Texas1Gardening-Vegetable Companion Planting ChartGardening-Vegetable-Planting-GuideGardening-Veggie Varieties for North TXGardening-When What to plant with linksMG-Companion planting chart-10 most common veggiesMG-Companion Planting Guide 2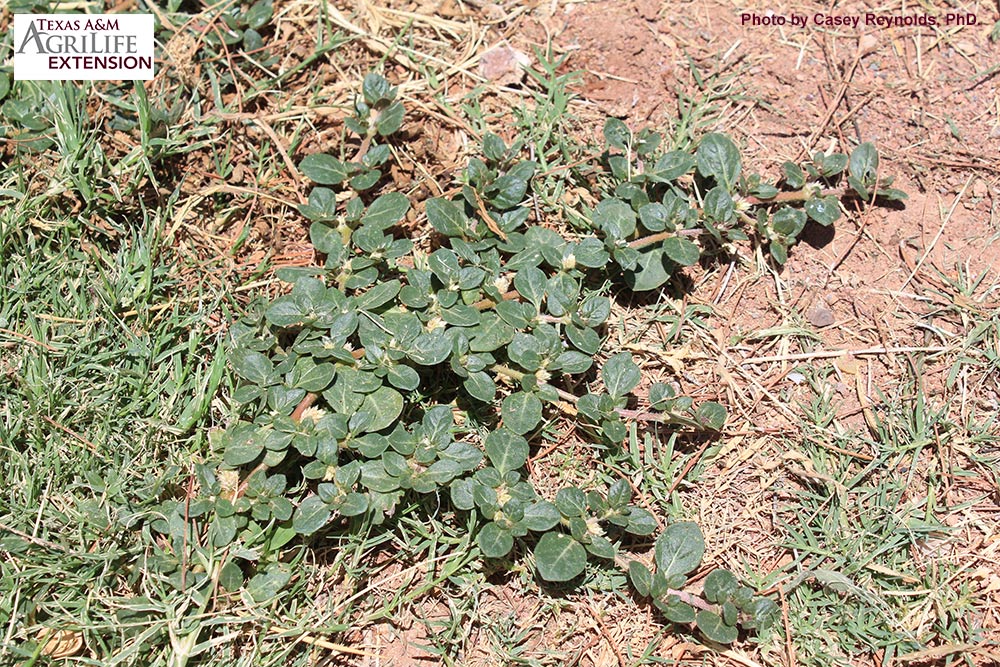 Khakiweed
Khakiweed is a broadleaf, warm-season perennial plant that grows low to the ground in a flattened out, prostrate manner; it has small white flowers in the summer that develop into prickly burs in the fall. The burs break apart into small ‘spears’ that can easily attach to animals, clothes, shoes and equipment. Khakiweed has a thick, deep taproot that helps it survive drought, and it can be challenging to control. The number one factor in keeping khakiweed at bay is to have something to occupy the ground space – it thrives in bare spots and thinned out turf. Whether it be a thick healthy lawn, deep mulch, groundcover, etc., there needs to be something to intentionally cover the ground to reduce weed growth.
First, use gloved hands or a garden hoe to physically pull up large, mature plants – be sure to get the taproot. Herbicide will not be very effective at killing fully grown plants. For smaller, actively growing young plants a herbicide that contains a combination of several active ingredients is more effective that just a 2,4-D broadleaf weed killer. Try a product that has a combination of 2,4-D with mecoprop, carfentrazone, dicamba, or metsulfuron (for example, Fertilome brand ‘Weed Free Zone’). Since khaki weed is a perennial, meaning it comes back from roots, pre-emergent will not fully control it; but pre-emergent is still very helpful if applied in the late winter (around February) to prevent new plants from coming up by seed. There are no pre-emergent herbicides labeled for khakiweed specifically, but a Texas A&M bulletin written by Scott Nolte, David Graf and Becky Trammel recommends trying a product with the active ingredient isoxaben (for example, trade name ‘Gallery’). See https://tomgreen.agrilife.org/horticulture/ to view the full publication. Always follow label directions when using any type of weed killer product.
Another tip – don’t scalp the lawn or mow too low, as this plant loves to grow out flat on the open ground. Raise the mower and cut the grass a little higher so the turf can shade it out.
In summary, now is the time of year when khakiweed begins to be the most troublesome because the burs really start to develop – but control efforts need to start in the late winter with pre-emergent, and in spring with broadleaf herbicide when the plants are still small. can really help prevent new khakiweed from coming up, but here are some suggestions for controlling existing plants and other ideas to help with prevention.
Remember there are no pre-emergent products currently labeled for khakiweed. The active ingredient isoxaben is a preemergent product that could be impactful but requires a half- to one-inch water event to ensure activation. An example is Gallery. Using post emergent products that contain one or more of the following is recommended. These are 2,4-D, MCPP, MCPA, carfentrazone, dicamba, metsulfuron, triclopyr, and/or fluroxypyr which have shown activity on khakiweed. A product containing two or more of these ingredients provides better control. Let me know if you have any questions.
Khakiweed-Control-Options-090518-SN-rdu
Drought Management-Help for Producers
Tips To Avoid Nitrate, Prussic Acid Poisoning in Drought Conditions
Nitrates and prussic acid build up in forages to levels dangerous to livestock during drought. Livestock face severe illness and even death after eating affected forages. Nitrates tend to concentrate in the bottom third of the plant. It shows in the plant’s stem and stalks more than leaves. Plants most susceptible to nitrate buildup include sorghum, Sudan grass, sorghum-Sudan grass hybrids, corn, millet and perennial grasses. Some weeds can also accumulate nitrates, including curly dock, jimsonweed, Johnson grass, kochia, lambsquarter, nightshades, pigweed, Canada thistle and smartweed. Poisoning symptoms include labored breathing, muscle tremors, weakness, lack of coordination, diarrhea, frequent urination and dark red blood. Death usually occurs within 1-4 hours after consumption.
How to reduce nitrate levels or lower the risk in forages:
- Raise the cutter bar 6 inches or more above the ground.
- Test forages for nitrate levels.
- Wait three to five days or more after a “good” rain for plants to regrow before grazing.
- Increase residual grazing and/or harvest height.
- Make silage, which causes forage to lose 25%-50% of nitrates.
- Slowly increase nitrate levels in feed.
- Do not feed to reproductive stock.
- Most importantly, do not green chop and feed.
During drought, prussic acids also can cause high cyanide levels in stressed leaves of young plants of Johnson grass and some sorghum lines. Pearl millet is unaffected. Prussic acid poisoning symptoms include accelerated breathing, foaming of the mouth and nose, involuntary urination, depression, inability to stand, muscle tremors and bright red blood. Death can happen within 15 minutes. Prussic acid concentrates in the new growth of plants, especially after drought, frost or herbicide damage. Levels drop over time and are not a problem in properly cured hay.
How to avoid prussic acid poisoning:
- Graze when forage is over 18-24 inches tall. Avoid grazing plants under 2 feet tall, especially during dry weather.
- Do not graze hungry livestock on sorghum or sorghum-Sudan grass hybrids. Poisoning increases with the amount of high-risk forage consumed.
- Do not graze short regrowth forage after hay or silage harvest or after close grazing.
- Wait two weeks or until forage grows 2 feet to graze after a “good” rain following drought, frost or herbicide damage.
Do not graze sorghum, sorghum-Sudan grass, hybrids or Sudan grass during or after drought, or if plants show signs of moisture stress. Test for toxicity levels before grazing.
Culling Continues as Drought is causing Forage and Hay Shortages
With dry weather, short/bare pastures, and watering holes drying up, ranchers are faced with some tough culling decisions. One way to match cows needs to available grass is to sell cows. One should think hard as to which grass eaters go first, under drought conditions, identifying those cows becomes top priority.
The first cut is simple, open and old cows need to go first. In my opinion it doesn’t matter how good of calf they raise you should always start with the oldest cows that are at the end of their ability to produce, and especially if they are becoming poor performers with decreasing body condition, raising lighter calves and giving less milk. Of course, the obvious culls are open cows of any age. We cannot afford to feed freeloaders when forage is short, well anytime for that matter. Next, cull lactating cows with bad disposition, bad eyes, bad feet or bad udders, now’s the time to remove cows with blemishes or poor-doing calves.
We all cull some cows every year, but I am talking about deep culling during a drought. Keep your best genetics in the herd as long as feasible. Keep the meat of the herd, those cows that are 4-8 years old without any defects, and that kick off a good heavy calf under normal conditions. But when you have lack of feed or water it’s time to act. And don’t wait too long it could mean the difference between culling the worse of the herd versus the best of the herd. Downsizing goes far beyond simply getting rid of bad cows, that is what we should be doing in a good year. We tend to hang on to cows we really need to ship, but in a drought, we have to be stern and can’t let emotions control our culling decisions. When a drought is localized, we might consider selling the entire cow herd and buying back next year. The market will be less effected so we normally get a good price for our cows because the herd can go to another part of the state or country not affected by drought. This year is a different story, and we don’t have that option to consider because the drought is widespread.
I think another good option is early weaning and selling your calves which can cut feed demand. That provides needed cash to buy hay and supplements for those cows you end up keeping, but of course this can hurt your annual income in the long run. These are tough decisions we all face and you have to do what you think will hopefully keep you in business come next year. We tend to all think about the short term when we are in a drought but don’t forget about the winter. You still have to get through the winter to keep what is left of your cow herd after culling. We all have hay stored up for the winter, unless you are forced to use it sooner. I don’t think standing forage will be an option this year so buying more hay if you can find it is a must right now, or cull really deep.
Even if rains return, expect below-average fall forage yields. Hay is high and all over the board, and so is quality. I have seen prices anywhere from $60 for junk and up to $145 for top quality hay. Trucking cost are $5-6 a loaded mile so that equates to an added $15(100 miles) to $30 (200 miles) a round bale at $5 a mile and hauling 35 bales a load. Tough times call for tough measures.
Here is a quote I think was fitting, “Producers who last longest in cow-calf businesses are not those who make the most money in good years. They are those who lose the least money in bad years” Let’s all keep praying for substantial rains!
Drought Decisions
Forage displacement (substitution)
- Some supplements displace more than their own weight in forage
- High starch and/or high fat feedstuffs
- Approximately 1.5 units of forage displaced by 1 unit of supplement Corn, wheat, whole cottonseed
- Some supplements displace a similar amount of their own weight eight in forage
- Moderate protein, high fiber feedstuffs
- Approximately 1 unit of forage displaced by 1 unit of supplement
- Soybean hulls, wheat middlings, corn gluten feed
- Some supplements displace less than their own weight in forage
- High protein feedstuffs
- Approximately 0.5 units of forage displaced by 1 unit of supplement Distiller’s grains, cottonseed meal, soybean meal
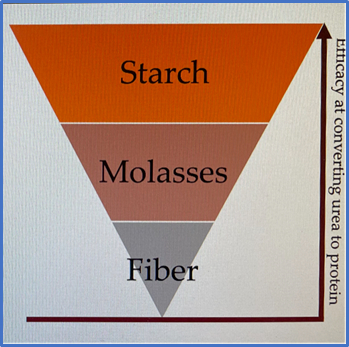
Urea as a protein source
- Rumen microorganisms can convert non-protein nitrogen (NPN) to microbial crude protein
- Urea is a common source of NPN in tub and liquid supplements
- Rapidly converted to ammonia
- Conversion to MCP is an energy-dependent process
- Starch > molasses > fibrous carbohydrates
- Ammonia won’t wait around for energy
- Risk of urea toxicity should not be overlooked
- Overly hungry cattle
- Poorly conditioned cows
- Young calves without a fully functional rumen
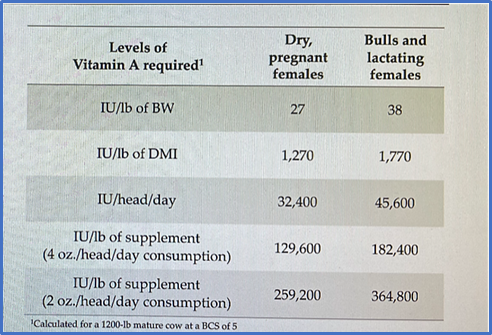
Mineral and vitamin supplementation
- Often overlooked, but critically important because
- Minerals and vitamins play important roles in all processes required for drought resilience
- Expect dormant forages to contain low levels of most macro-minerals and to be void of Vitamin A
- Trace mineralized salt is not an adequate mineral and vitamin supplement
Hay quality guidelines
- Mature females and bulls
- At peak nutrient requirements:
- 12 to 13% crude protein
- 62% TDN or 0.63 Mcal of NEm / lb of DM(Dry Matter)
- At lowest nutrient requirements:
- 6 to 7% crude protein
- 45% TDN or 0.37 Mcal of NEm / lb of DM
**Assumes that hay is being fed free-choice without supplementation
***If limit-feeding, it may be beneficial to purchasing higher quality hay
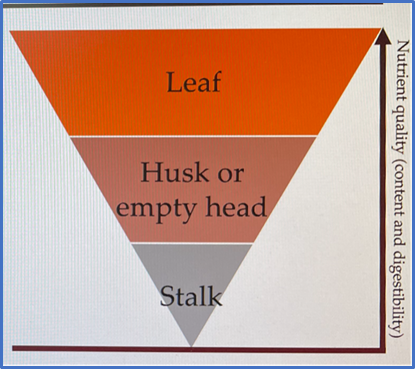
Corn and grain sorghum stalks
- In terms of nutrient content and digestibility.
- Leaf is pretty good
- Husk or empty head is okay
- Stalk isn’t very good
- Cattle will eat the higher quality residue first, beginning with grain and leaf
Stretching Limited Hay Supplies
Cattle-145 stretching hay supplies wet cow fed low quality hay-Banta
Cattle-144 stretching hay supplies dry cow fed low quality hay-Banta
Testing Forages and Hay for Hydrogen Cyanide (Prussic Acid) Potential
Testing Forages for Hydrogen Cyanide Potential
Effective Fly Control Strategies
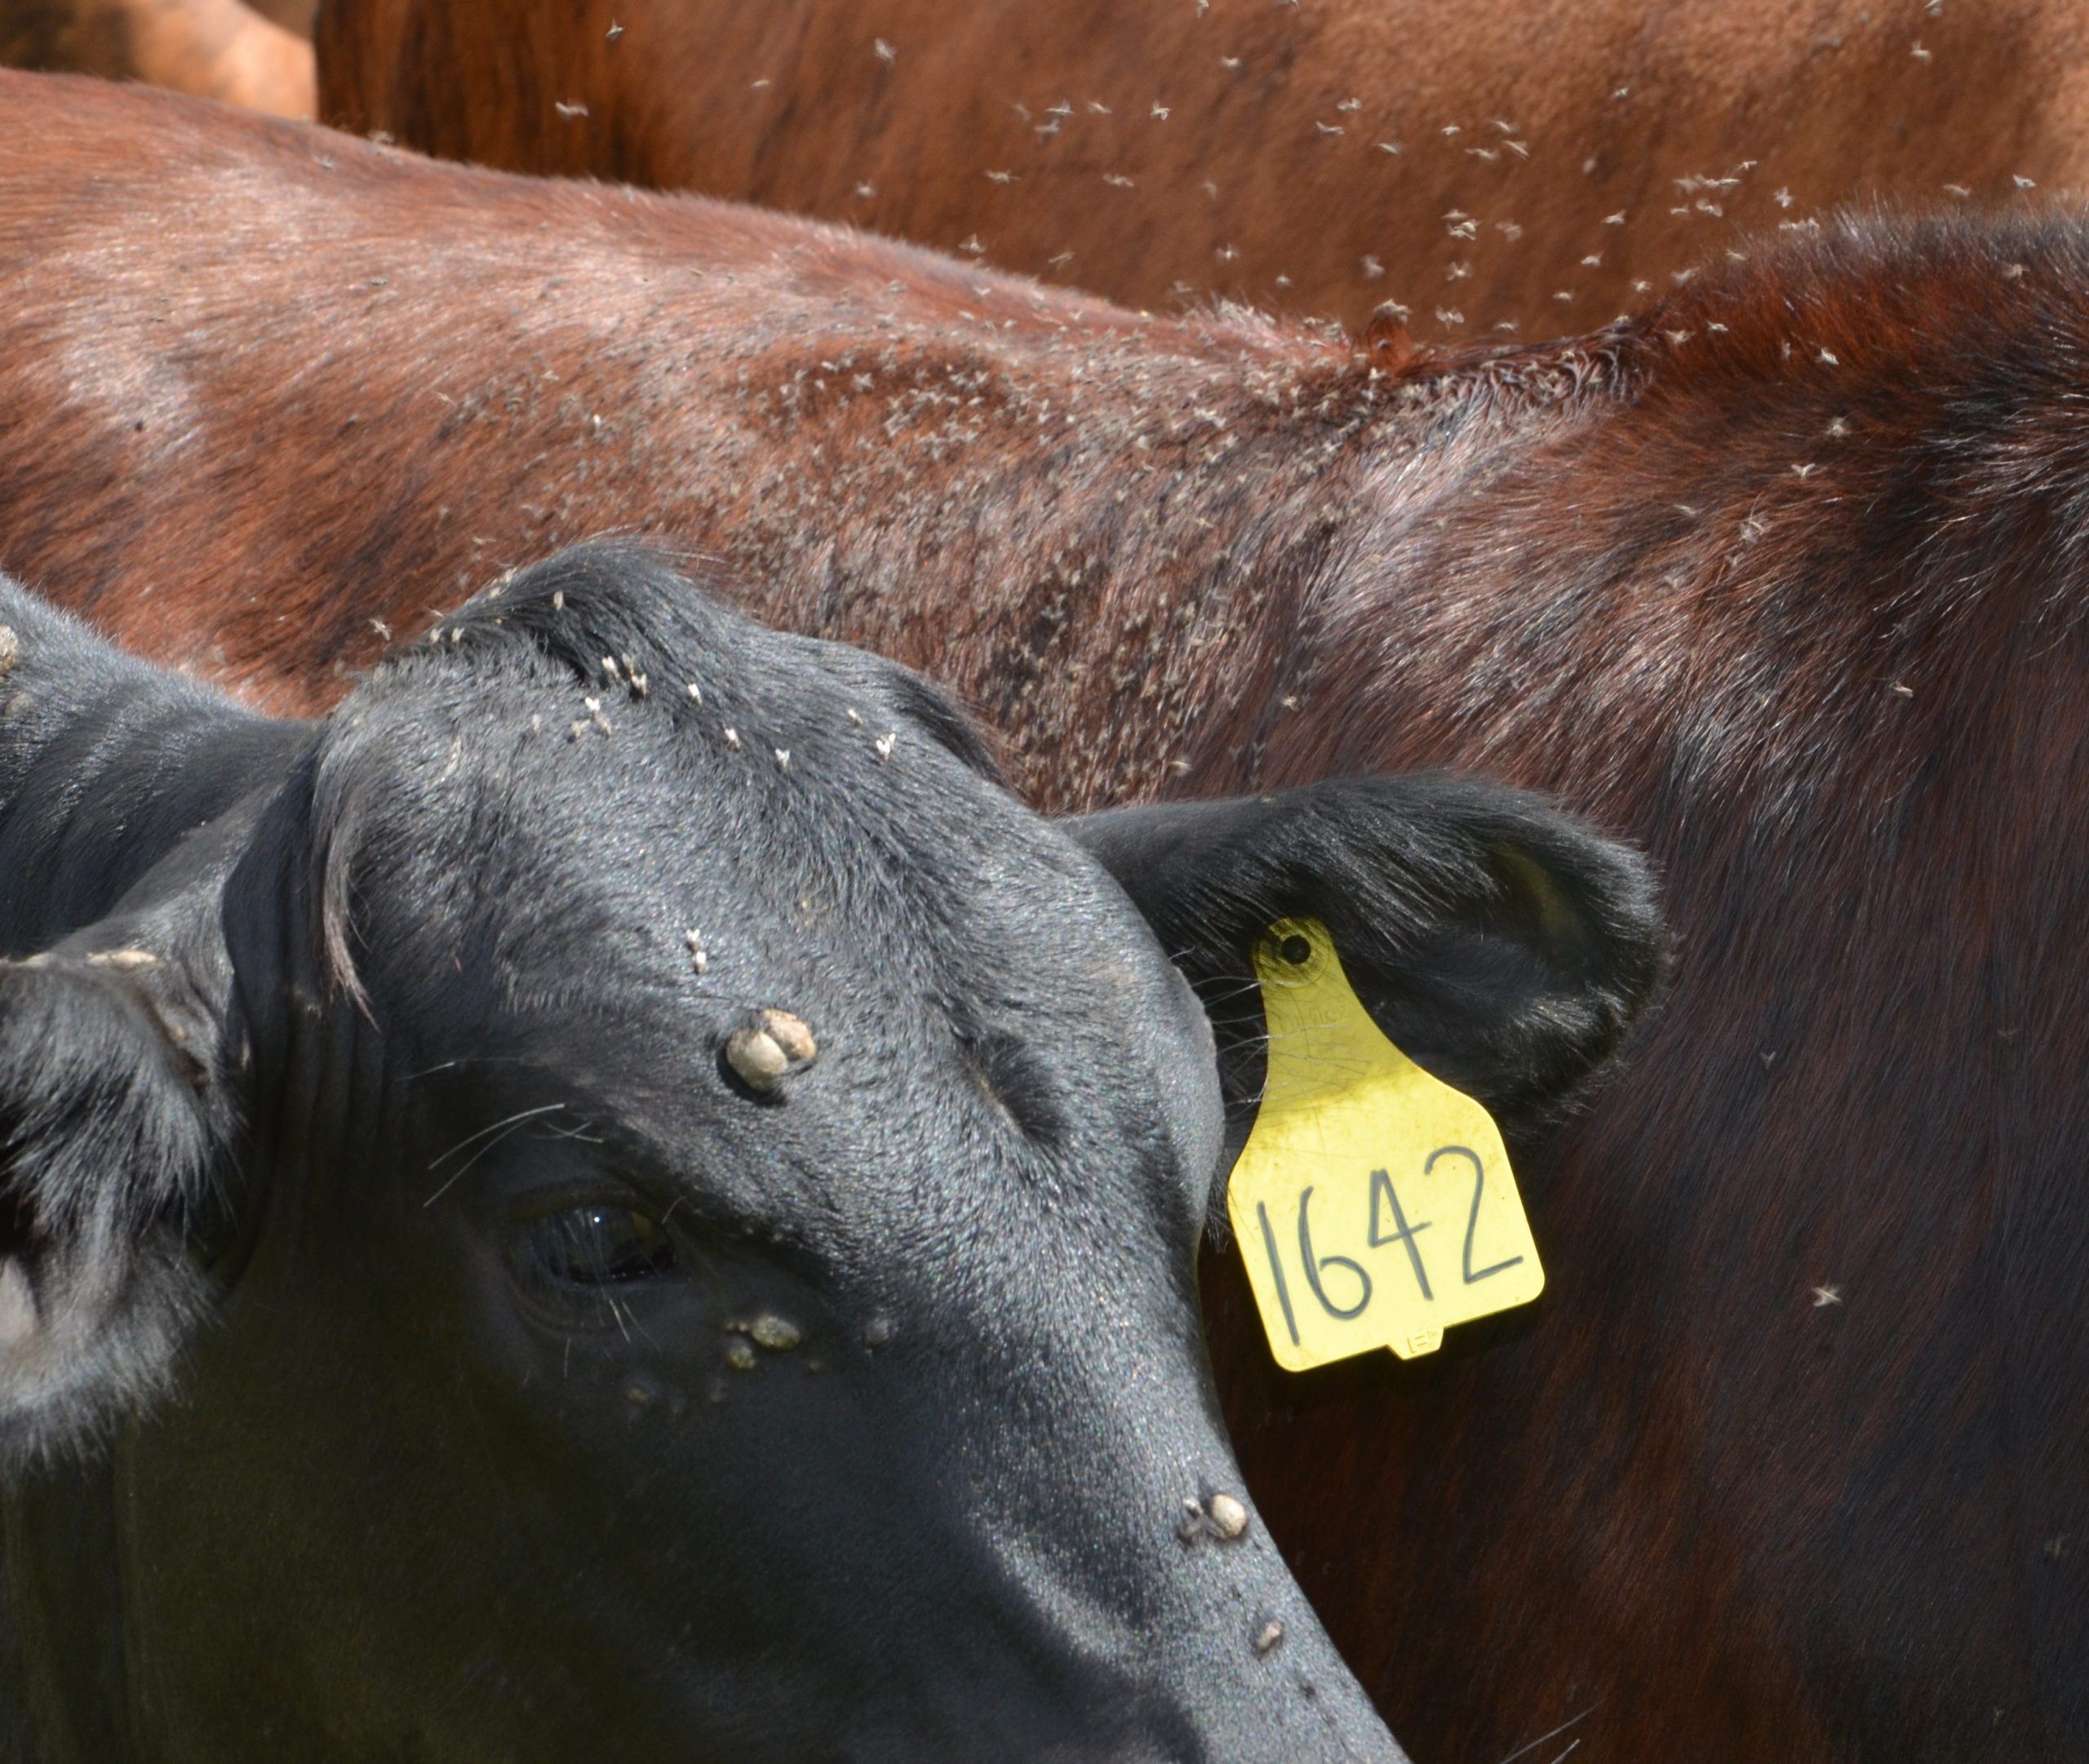
Horn flies are a very damaging pest for beef cattle here in Texas. Research has shown that a calf infested with more than 200 flies will weigh 15 to 20 lbs less at weaning. In order to suppress them in the best way you should understand their life cycle and possible control strategies.
Identifying the Fly
Horn flies look very similar to stable flies so in order to identify them you should observe their feeding behavior. Horn flies feed most often on the animal’s back shoulders, and sides. Stable flies tend to feed primarily on the cow’s legs. The horn fly will lay it’s eggs in fresh manure and the eggs reach maturity within 10 to 20 days.
Horn flies usually are first observed in early spring and tend to peak in early summer. This decline is due to the hot and dry temperatures in late summer. The cooler temperatures in the fall generally causes an increase in numbers again till later in the year. When the first good frost shows up they will go dormant till the spring warm-up.
There are many resources available to learn about the horn fly such like from your local veterinarian or your local extension office. Another source of information you can go to is the Livestock Veterinary Entomology department at Texas A&M University.
Fly Control Methods
In order to suppress the horn fly population effectively you should use what is called an integrated pest management (IPM) approach. An IPM relies on multiple tactics in order to control fly populations. These tactics include cultural, biological, and chemical methods in order to suppress these pests.
Ear Tags impregnated with an insecticide is a very common product type that many producers use. These are popular because once they are applied to the cow they continue working for months.
Sprayers and dusters are another option that can be used. These products though tend to not suppress flies for very long.
Feed additives are another popular approach for fly control. Some tend to go with this option because it is less labor intensive. You just put the feed or mineral out and that is it.
With each product there is it’s own set of pros and cons that go with them. It is best to visit with your veterinarian to see with options would work for you. Then weigh the options and go with the product that works best for you.
Marty Morgan, Wise County Ag Agent
What is anaplasmosis? What you need to know about this costly cowherd disease.
Anaplasmosis is a blood disease that can be fatal to cattle. Once you get it, you’ll never get rid of it.
There are many diseases that cattle producers must confront and overcome during the year but one is becoming far too familiar. It’s anaplasmosis, a bacterium that infects the red blood cells. And once you get it in your herd, it’s impossible to get rid of. Once an animal becomes infected, its immune system recognizes the abnormal red blood cells and removes those infected from the body. Cattle constantly create new red blood cells, but as the disease progresses, the animal can become anemic.
The loss of red blood cells leads to a decreased oxygen-carrying ability, which then causes clinical signs. It usually takes about a month from time of infection to clinical disease, but the range is six to 70 days. Although this disease can be spread at any time, clinical cases are most common during the late summer and early fall when transmission threats increase.
What are the clinical signs?
Unlike most disease processes, clinical signs usually only occur in adult cattle older than 2 years of age. This is due to younger animals having a greater ability to replace damaged red blood cells. Many times, the first clinical sign of the disease is dead adult cows or bulls. Animals with clinical disease will have severe difficulty breathing, lethargy and may be extremely aggressive. Abortions, fever, weight loss and icterus (yellowing of mucous membranes) also can occur.
Treatment options
Acute infections can be treated with injectable oxytetracyclines. Early treatment stalls the infection while the animals regenerate red blood cells. However, in severe cases, simply moving the animals can kill them due to the low levels of oxygen and red blood cell loss. Animals that recover will become lifelong carriers of the organism. The positive side of this is these animals will have built an immunity and it is rare that carriers would break with clinical disease again. The negative side is these animals will be a reservoir for disease transmission through the herd. As areas become endemic and high rates of early life infections occur, the disease begins to normalize within herds.
Steps for control
Due to the complexities of this disease, anaplasmosis control practices must have several tiers. Many of these control strategies depend on the area and risk to each individual herd. Having a strong veterinary-client-patient-relationship is extremely important when developing a control plan.
A local veterinarian can help establish risk of infection and determine the realistic cost of the disease to an operation. A true estimation of costs should at least include diagnosed deaths and abortions. It also is important to note that once anaplasmosis has entered an area, eradication becomes obsolete. Control strategies help minimize the number of clinical signs and death loss, but do not prevent infection.
Hypodermic needles are very efficient at transmitting this disease. A 2010 study showed that six out of 10 “clean” animals became infected after needle injections following a positive animal. Changing needles between each animal not only eliminates this transmission, but also helps curb other blood-borne diseases such as bovine leukemia virus.
Any instrument or tool that comes in contact with blood should be cleaned and disinfected after each animal. In addition to needles, examples include ear taggers, tattoo pliers and castration equipment.
Managing external parasites that transmit the pathogen also should be at the top of the list of control measures. Certain tick species, mostly the American dog tick, can amplify the pathogen in their salivary gland and, therefore, expose the next cow to a larger amount. Stable flies, deer flies and horse flies also can transmit the organism.
Season-long parasite control typically involves both environmental control and parasiticide use. Proper manure and feed-site management will help decrease the breeding ground for some of these pests. Parasiticides also are targeted to specific pests during certain times of the year. Example modes of application of parasiticides are pour-ons, sprays, dust bags, ear tags, rubs, feed-through IGR or larvicides, and environmental application. A mixture of two or more of these methods often is indicated to obtain season-long protection.
Chlortetracycline (CTC) also can be fed to cattle during the transmission period to help control anaplasmosis. Expectations of the use of this medicated feed often are misunderstood. Feeding CTC will not eliminate the pathogen, but rather reduce the likelihood of a clinical case.
Use of this feed-grade antimicrobial falls under the Veterinary Feed Directive and must be used under veterinary oversight. Consistent consumption and proper delivery is paramount with CTC use. CTC can be delivered to cattle daily, either in a mixed ration or as “hand-fed” mineral. The dose for these usages is formulated for the cows to consume 0.5 mg per pound of body weight per day.
The most reliable delivery mechanism to reach this consumption level would be daily delivery of a mixed feed. However, this is not practical in many pasture settings. Medicated mineral delivery is another option. While mineral delivery may be beneficial to the producer due to labor, inherently it is a less efficient delivery mechanism of the drug. This is mainly due to inconsistent daily intake.
If mineral delivery is utilized, monitoring of consumption is required. For free-choice feeding, there are four Food and Drug Administration-approved propriety formulations available that provide 0.5 to 2 mg per pound of body weight per day. These free-choice approvals account for proper consumption and variations in intake under the free-choice application.
There is not a fully USDA-licensed vaccine on the market for anaplasmosis. However, there is an experimental vaccine that producers may be able to utilize in some states. Use of this vaccine requires approval from the state veterinarian. While the vaccine does not prevent infection, anecdotal reports show a reduction of clinical signs in at-risk animals when proper label instructions are followed.
To maximize the effectiveness of a control plan for anaplasmosis, it must be multimodal. Consult with the local veterinarian for the best management protocol.
How do I Control Dallisgrass in My Lawn?
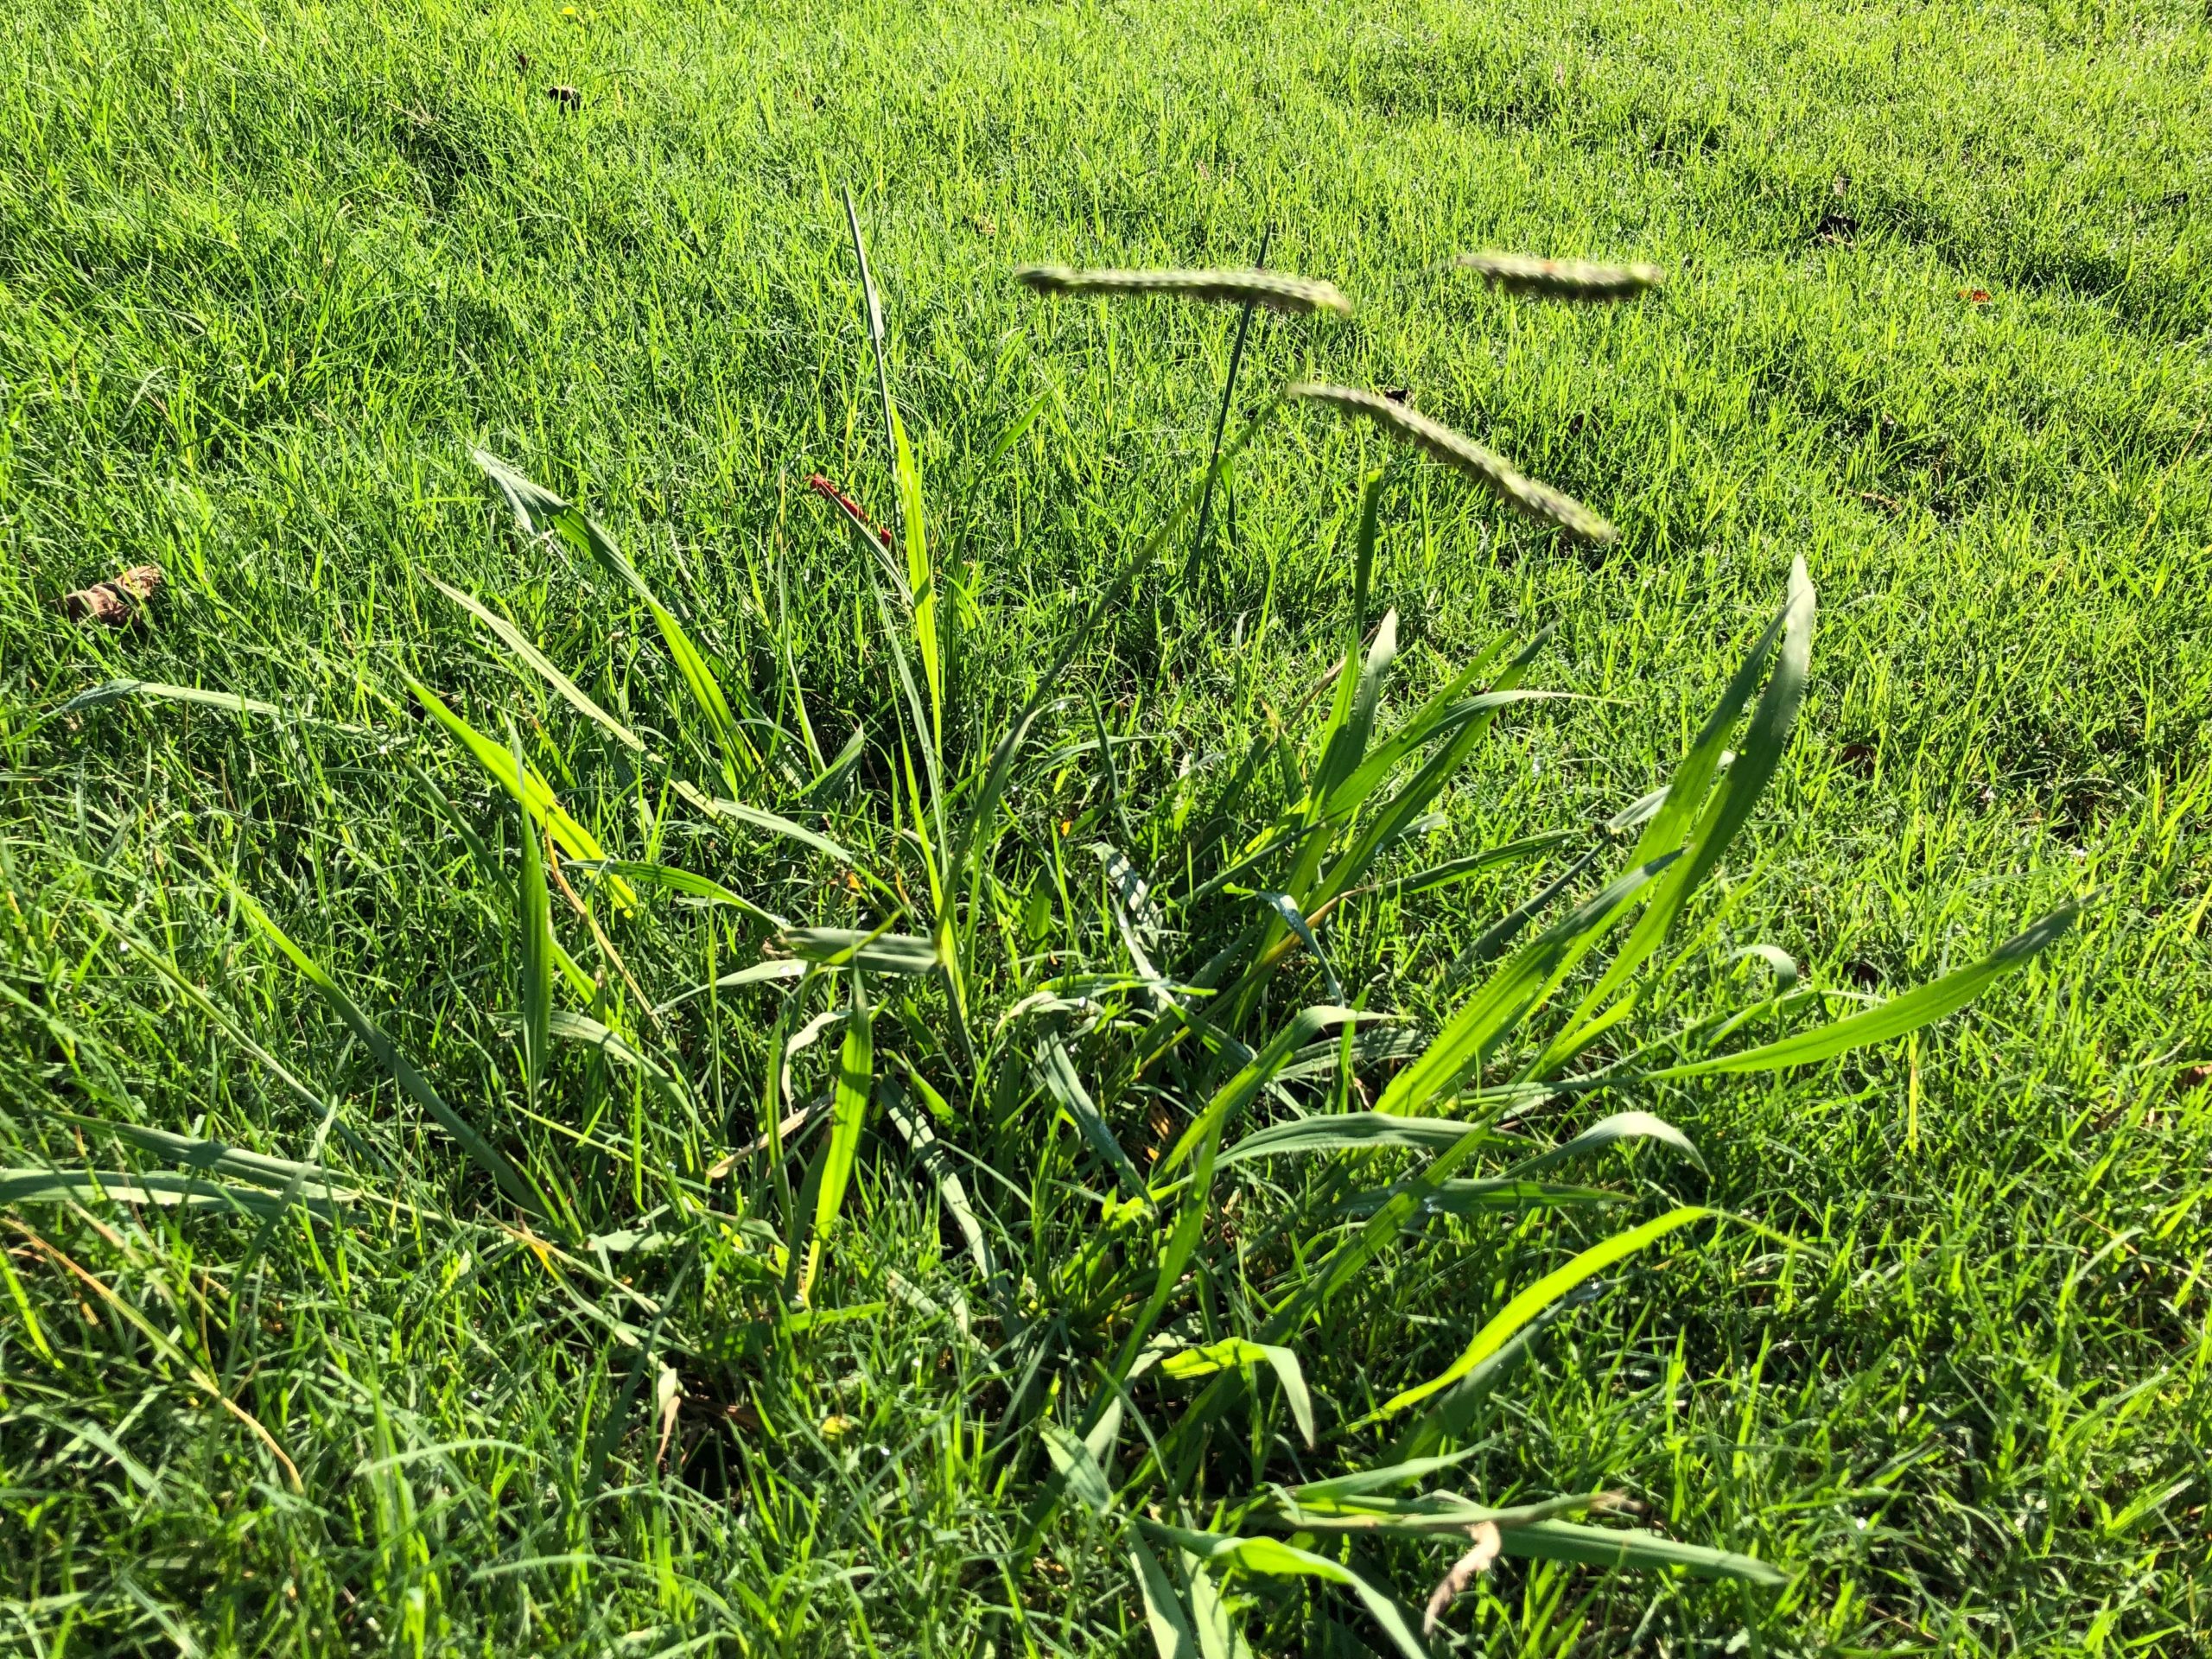 Dallisgrass is a cuss word to most of us, as it tends to take over your lawn with no fear of anything except maybe multiple doses of glyphosate! In my opinion Dallisgrass is the most difficult weed to control in the lawn, especially in St Augustine grass. Yes, even worse than grassburs, sedges and crabgrass, since we have several good pre-emergent products to help control these in the lawn.
A spot treatment using glyphosate is one way to maybe kill Dallisgrass. Sometimes even this approach takes repeated treatments. This aggressively growing, perennial grass has an impressive ability to recover from all herbicide applications thanks to its robust rhizomes. Dallisgrass is most sensitive to post-emergent herbicides in the spring to early-summer and again in the late-summer to early-fall, so careful timing is essential to getting the best performance and kill. Timing is key to all herbicide applications and the plant needs enough leaves present to soak up a potent amount of chemical. Besides soil temperature, one thing that will help you as far as timing is to know your Growing Degree Days. GDD has proven to be a simple and effective tool to optimize the timing of spring applications. This GDD-based timing has also performed well for other chemistries targeting Dallisgrass. Visit the GDD tool from Syngenta on Greencastonline.com to see the current GDD accumulation in our area, or to sign up for email alerts when GDD thresholds are met. We will take every tool available to fight this weed!
As for Herbicides options other than glyphosate we really don’t have any products that will completely eradicate Dallisgrass, but these next three help suppress it. Bayer Ag makes Celsius WG and could be an option for suppression for Dallisgrass but likely not a control option unless it was caught early, and multiple applications were made over multiple years. Celsius may also be tank mixed with another Bayer product called Revolver to increase your chances to control of Dallisgrass in Bermuda and zoysia, but only use it as spot treatment on St. Augustine, and it will likely cause temporary discoloration of all grass types. Syngenta makes two products called Manuscript and Monument. Monument offers multiple chemistries for Dallisgrass control(suppression mainly) in Bermudagrass, Zoysiagrass and St Augustine, which can be assembled into an effective season-long approach and will control crabgrass or sedges too. Besides Monument for controlling nutsedge, another good product is Sedgehammer. The label for Monument states that it will suppress Dallisgrass which means it will have significant activity in helping to control it, but rarely complete control (eradication). And a repeat application will likely be needed 4-6 weeks later, and more than likely each year after, for several years. Again, I recommend spot spraying St. Augustine because of its sensitivity to most all herbicides. For professionals there is Manuscript which can be used on bermudagrass and zoysia grass, but the product label says should be applied to Sod Farms only when it comes to St Augustine grass (non-residential). Manuscript must be used in combination with Adigor Spray surfactant to be affective. When using these products mentioned, a lot of factors come into play but especially pay attention to what type of grass you can use them on, the recommended rate, soil temperature, and growing degree days. It’s very important you “READ and FOLLOW the LABEL DIRECTIONS” and also pay attention to yearly limits on total amounts that can be used. There are other strategies that can or may help, such as maintaining a healthy, densely planted turf through proper watering, mowing, and fertilization. Do not overwater!
Dallisgrass along with Crabgrass and Sedges are a plague on turf lawns throughout the south, but with diligence, persistence, and some knowledge about how to help control these pesky weeds we can hopefully prevent them from taking over. With the information provided, good timing, and a lots of luck, we hope these persistent grassy weeds can soon be eradicated from your treasured lawn. Good Luck!
How to Manage Pecan Scab
Pecan Sc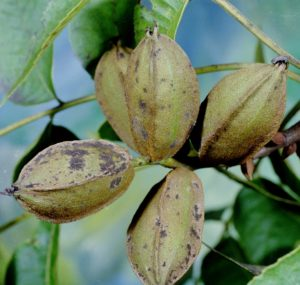 ab is a common fungal disease of pecans that can cause premature nut drop. Time is running out for that first application to help head off this dreaded disease. You need to get that first spraying done before pollination according to the experts. Usually that is around mid-April so get it done soon.
Symptoms include black lesions and tissue death on twigs, leaves, and nuts from early spring until late summer. Wind and rain spread spores of the disease organism and couple that with warmer days pecan scab can be severe and has the potential to wipe out your pecan crop if not properly treated and applied at the right times.
One form of controlling scab is planting pecan varieties with resistance to pecan scab which can reduce disease incidence. But for the established pecan trees that option is not available. The only option on young or well-established trees is to spray a fungicide starting early spring around bud break to pre-pollination to control the primary infection. If left unsprayed the fungus will produce a great abundance of spores on the surface of these primary infection sites and become visible to the naked eye within 7 – 9 days and then spreads throughout the trees infecting young shoots, leaves, and yes, nuts. The leaves will have olive brown dots to lesions that are barely visible at first. On the nuts, scab first appears as black dots and get bigger with age. If the infection is severe, the entire nut surface will turn black, kernel development will stop, and the nut drops prematurely.
We don’t want to get to that point, but unfortunately once the fungus has invaded the tissues, it becomes protected from most fungicides and can continue to produce spores. Therefore, thorough coverage of leaf, nut, and shoot surfaces with a fungicide must be maintained during the season to prevent secondary infections following rains providing wetting periods sufficient to allow germination and penetration. Sanitation measures, such as plowing or disk harrowing under fallen leaves and shucks, help reduce primary infections. Pruning to open the tree for better air circulation will help reduce scab occurrence by reducing the number of infection periods occurring during the year.
See the Homeowners spray guide and fungicide chart under my ANR tab under Fruit & Nut Tree Management on our website at https://wise.agrilife.org/ag/fruit-nut-tree-management/. I have tons of great information there to help you manage your Fruit and Nut Trees!!! When in doubt check it out!
Don’t wait to see this, spray now and hopefully avoid this disease altogether!
__________________________________________________
Texas Farm Animal Liability Act SIGN
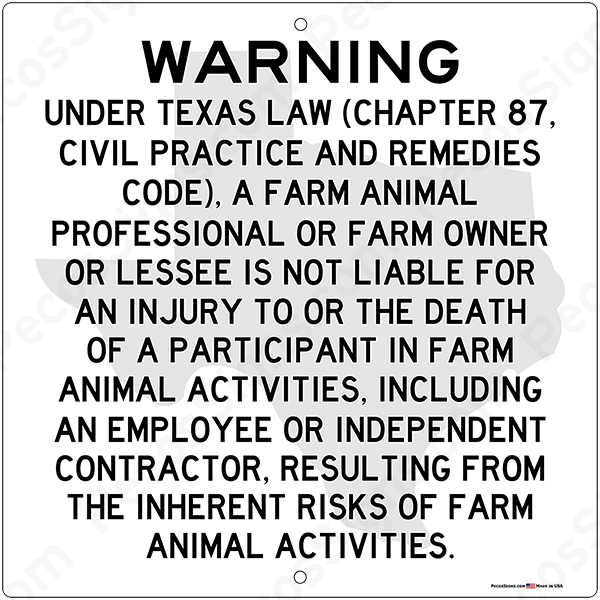 It seems that in today’s world we need and have, a sign for everything. We have signs when we travel that identify roads to help us get to our destination without getting lost or having a fight with your better half! We have signs that tell us the speed limit and whether to stop or yield, do not enter, and much more. I am very thankful for the great road signs that we have in the Lone Star State! We have signs for restaurants, hotels, shopping Centers and the list goes on. If you stop a second and take a look, signs are all around us and I would say they are good for the most part. When it comes to Farms and Ranches once you travel down a country road and drive thru the gate the signs usually disappear. Oh there may be an occasional sign of some sort like a ranch business sign, a cattle association sign, a cattle or deer crossing sign, or one to direct trucks where to load or unload, or even one that warns the that the dog bites or the kids are at play.
I have visited a lot of ranches all over Texas and Oklahoma buying cows and bulls over the years, and these signs are few and far between. Well don’t worry if you don’t have a sign! Now there is one you all will definitely need to post. The Texas Farm Animal Liability Act through House Bill 365 made changes that went into effect this September, and anyone who owns livestock in Texas, which includes horses, cattle, sheep, goats, pigs, fowl and honey bees in a managed colony, will need to hang this sign on the on the barn door or cedar post. New signs must be posted to get Texas Farm Animal Liability Act legal protection beginning Sept. 1. We have had this Farm Animal Liability Act to protect farmers and ranchers since 1996 but we were not required to post a sign. Well after the Supreme Court case in 2020 essentially ruled the act did not apply to injuries on working farms and ranches, this has changed thanks to our elected officials looking out for us in Austin. So to sum it up, in order to get the statutes full protection, farm and ranch owners and lessees must also now hang a sign at or near their arena, corral or stable. And here is how it reads:
Warning
Under Texas law (chapter 87, civil practice and remedies code), a farm animal professional or farm owner or lessee is not liable for an injury to or the death of a participant in farm animal activities, including an employee or independent contractor, resulting from the inherent risks of farm animal activities.
For more details visit these websites
Texas Ag Law:
AgriLife Today:
Texas Farm Bureau:
https://texasfarmbureau.org/farm-animal-liability-signs-available-from-texas-farm-bureau/
Where do I get the signs?
Signs may be purchased online through TFB Store at texasfarmbureau.org/store.
Or Google “Farm animal liability signs” as there are many places to buy them.
Renewing your Texas Livestock and Horse Brands
 Here in Texas by law brands have to be re-registered every 10 years and we are starting a new 10 year period this August. We use brands mainly (also earmarks, tattoos or RFID tags or chips) to identify and mark our livestock especially our cattle and horses. It’s an old lifelong tradition and practice that has stayed the test of time, simply put, to make sure someone doesn’t steal, borrow and sell your cattle or horses. Cattle Rustlers and Horse Thieves were hung back in the day. Back in the 1800 ranchers would run their cattle together on the open range and would use the brand to mark it for identification, for a couple of reasons mainly. The first was to discourage cattle rustling and the second was so when the trail drive reached the rail head in towns like Abilene and Dodge City KS they would sort the cattle and get paid for those with their brand on it. It was a necessity then, and still is important today even though we have fences and ways of keeping our cattle separated for the most part, if your honest.
Believe it or not we still have cattle rustling going on today and thus we have brand inspectors at each livestock market to inspect the brands and make sure they belong to the owner of record. We also have a great organization in The Texas Southwestern Cattle Raisers Association where members benefit from the detectives on staff when cattle are lost or stolen. Anyway, back to registering your brand. Folks either don’t know or forget that they must re-register their brands every ten years. While there is no law that requires you to brand your livestock it is a great practice to err on the side of caution, especially when cattle prices are high. When a calf is bringing $800 to over a $1000 at the market, the temptation is great for those not walking the high and narrow road. There are other legitimate reasons for registering your brand. For instance, the Texas Animal Health Commission can trace back for animal disease; Agricultural lending institutions use brands to secure livestock loans; County sheriff offices determine ownership of estray livestock; and Judges and attorneys reference brands in many types of civil litigation involving livestock.
Brands are registered in Texas by the County Clerk of the county in which you run livestock. The brand must be registered by the county clerk for the brand to be considered a legal means of ownership. You will not receive a notice in the mail to re-register so that is on you. The cost varies by county so contact your County Clerk for pricing. To register your brand in the county or counties in which you run cattle, you must obtain a “Mark and Brand Registration” form. Fill the form out completely and take it to the county clerk in the county or counties in which you operate or have livestock. Remember If you do not re-register, then your brand is up for grabs by someone else. That would be a crime in itself to the fourth and fifth generation ranches that take pride in their name and brands. There is a six month grace period from August 2021 to February 2022 so take care of business well before next February. A good resource to answer all your questions is the FAQ’s on TSCRA’s website at http://www.tscrabrands.com/ Wise County recording fee for brands is $5. Visit https://www.co.wise.tx.us/153/County-Clerk for more information or call 940-627-3351
Feral Hog Information
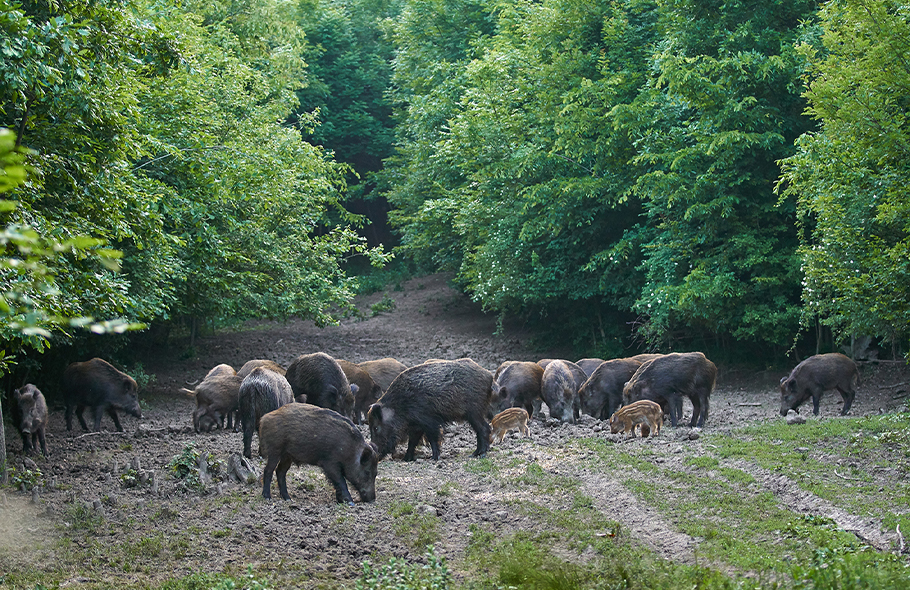 Feral Hogs are wreaking havoc on our farmers and ranchers crops, pastures and hayfields here in Wise County and pretty much all over the state of Texas and Oklahoma. They are making a mess of things and tearing up jack! So what do we do and what options are available to try and depopulate the Sounder(herd)? We have tried for years to trap and hunt these rooting devils but to no avail. They reproduce so proficiently that we cant keep up with their increasing numbers. They can have up to three litters a year with up to 20 piglets in a litter so we are losing the battle and have been for a long time. One sow can produce from 30-60 pigs a year and there are thousands of sows out there. One company tried getting a bait called Kaput on the market that would have sure helped with the battle but they got the door slammed shut and wasn’t welcome in Texas for numerous reasons, mostly political. It was a poison and that scares people, although it would have been safe with a delivery system that would allow only hogs access. It would have left a blue residue in the meat of hogs and they would have been unfit for consumption, which was another hitch in the get-a-long. And you could not graze the pasture for 90 days after using the product another negative. So what is the answer? Well, a contraceptive has been being kicked around for a couple of years but that too has its pros and cons.
Here is some literature on the birth control idea:
An Evaluation of Contraceptive Viability in Wild Pig Management
Well Hi-Pro feeds has come out with a contraceptive formulation(birth control for the male hog) called HogStop. Visit their website at https://hogstop.com/ for more information, Use directions and to find a dealer near you. You can visit their website at https://hogstop.com/
And here is what the manufacturer says about their product: HogStop offers the perfect solution to control the number of feral hogs in your area. Our bait is composed of ingredients, commonly found in some livestock feeds, that inhibit the fertility of the male hogs when eaten. Whether you are dealing with a few hogs in your area or a larger hog issue, HogStop is your easy answer to keeping them under control. Well that is to be seen but a good start.
What is HogStop and How do I use it? HogStop is a mixture of ingredients, commonly found in some livestock feeds, that is fed to feral hogs to reduce their numbers on your farm or ranch. It acts as a male contraception on feral boar hogs. Sperm counts in feral boar hogs are reduced and hence fertility. Births of baby pigs are decreased and feral hog populations decrease over time. HogStop is not a poison that will kill the hogs. It should be fed in hog-specific feeders that are designed to keep out all other species.
HOGSTOP®
The new Oral Contraceptive in the battle against Feral Hogs Reduces the fertility of feral hogs within 5 days and maintains fertility interruption for at least 30 days when fed as directed.
Contains only non-toxic ingredients. Contains all-natural ingredients. This product should only be used to control the reproduction of feral hogs on pastures, range land, forests, and non-crop areas. This bait should only be applied in hog feeders equipped with heavy lids (minimum of 17 lbs. total lid weight) on bait compartments to limit access by non-target animals. Locate hog feeders in or near probable resting areas for hogs as indicated by sightings, soil rooting, hog wallows, and fresh hog tracks and scat. Secure feeders in place to prevent hogs tipping them over. Ensure that there are sufficient feeders to address the hog population.
Read the FAQ’s here https://hogstop.com/qa-hogstop-feed
Recommended Feeders
We recommend using our partner’s patented feeder(s). They are designed to decrease any environmental impact outside of feral hogs by making it difficult to reach by cattle, deer, birds, and other animals.
The Barclay Feeder(green one)
The Barclay Feeder was designed with cost-efficiency, ease of bait flow, and hog accessibility in mind. In addition to the tried and true weighted pressure plating system, the novel ‘scent grate’ at the lower front, helps to lead the wild hogs right to the front access point. This cuts down on the time it takes for the hogs to find the actual HogStop bait. The Barclay Feeder’s weighted lid/pressure plate makes it as easy as possible for hogs to access the bait, while simultaneously making it extremely difficult for non-target species to do the same.
Available for purchase by contacting:
C: (806) 279-0458
E: BarclayWeldingHF58@gmail.com
WPF – Wild Pig Feeder(silver one)
WPF, Inc. has patented a species-specific feeding system offering a solution targeting the wild-pig population control issues. In conjunction with Hogstop bait, a solution exists to control the explosion of wild pigs utilizing a birth-control product in partnership with a species-specific feeder that only allows pigs to feed in the unit. Constructed of 12GA galvannealed material and easy to assemble in the field, this feeding system also employs an optional GPS system enabling the capture of number of times the unit is accessed in the field as well as being able to monitor the amount of feed level in the unit for hands-off monitoring. ‘Bear-bars’ are used on the floor to keep out larger animals that may try to access the door to feed. The feeders are manufactured by SpecFab Services, Inc. located in Greenville, SC.
Available for purchase at:
P: (864) 242-3345 Email wpfeeders@specfabservices.com
Available at a local feed store near you! Any feed store can carry both HogStop bait and our recommended feeders. HogStop contraceptive bait is available for purchase anywhere Hi-Pro Feeds are sold. If your local feed store doesn’t carry HogStop, ask them to do so by calling HiPro to set up their distribution account!
Or Call HiPro:(806) 250-6820
That is all the info I have on the subject at this time, when I have more I will surely pass it along!
Good luck on getting the Feral Hogs on your land under control!
August 11, 2021
Pecan Scab!
I have received several calls last week like what are these black spots on my green pecans? Why is my pecan turning brown or black? Why is my pecans falling off? All good questions when you have pecan trees. Our pecan growers in the county know all about different diseases, and spray for it, and many others each and every year. But to homeowners, especially newcomers to the Ag community they don’t know about all the management that goes into raising some good pecans. Pecan scab is a common fungal disease of pecans. Symptoms include black lesions and tissue death on twigs, leaves, and nuts from early spring until late summer. Wind and rain spread spores of the disease organism. Because rain and high humidity increase scab infection, pecan scab is more severe in Central and East Texas. Small, circular, olive-green to black spots form on the lower surface of the leaf and nuts. These spots may have a velvety or cracked appearance. Sometimes these spots coalesce forming large, irregularly shaped darkened areas. On nuts, these spots appear to be sunken in. Infected twigs will exhibit elongated spots parallel to the twig axis. Infected foliage may prematurely drop. When infection is severe, the entire nut surface is black, development is arrested and the nut drops prematurely or fails to grow in the area of infection.
More on Pecan Scab here https://pecankernel.tamu.edu/diseases/#scab
Pecan scab monitoring – Regional disease pressure
| Month | ||||||||
| Location | S | A | J | J | M | A | M | Scab Severity |
| Texarkana | 0 | 0 | 0.5 | 2.5 | 5.2 | 4.6 | 2.4 | Severe |
| Palestine | 0 | 0 | 1 | 3.8 | 6.8 | 6.8 | 3.2 | Severe |
| Dallas | 0 | 0.3 | 0.7 | 3.2 | 5.4 | 5.2 | 2 | Moderately severe |
| Victoria | 0 | 0.2 | 0.9 | 2.9 | 4.7 | 3.5 | 1.6 | Severe |
| Austin | 0.1 | 0.1 | 0.8 | 3.5 | 7.3 | 5.8 | 2.1 | Moderately severe |
| Seguin | 0.3 | 1.3 | 3.2 | 8.7 | 15 | 10 | 4 | Moderate |
| Weatherford | 0 | 0.1 | 1.2 | 5 | 7 | 9 | 3.5 | Moderately light |
| Brownwood | 2 | 1.3 | 2.2 | 6 | 9.7 | 9.7 | 4.3 | Light |
| Uvalde | 0.5 | 2.3 | 3.3 | 8.3 | 14.5 | 9.7 | 3.8 | Light |
Table 1. Comparison of different areas of Texas using days above 90 deg. F: Days receiving measurable rainfall ratio on pecan scab severity
Publication called Pecan Fungicides and Herbicides found here:
https://tpga.org/wp-content/uploads/2019/05/Pecan-Fungicides-and-Pesticides-Monte-Nesbitt.pdf
https://pecankernel.tamu.edu/diseases/#scab
Control:
- Planting pecan varieties with resistance to pecan scab can reduce disease incidence in Central and East Texas. Other actions to minimize pecan scab are proper pruning and wide spacing between the trees, which can improve air circulation and speed leaf drying.
- Dormant season spray and Sanitation will help with all pests and diseases.
- Fungicides applied as a foliar spray on young trees can prevent pecan scab. To maintain control, they must be applied early and then reapplied. The fungicides labeled for control of pecan scab on bearing trees are not available in small quantities marketed for backyard trees.
Good Fungicides: There are many to choose from and they can get expensive!
Abound®
Pristine® fungicide
Pecan Management Calendar – file:///M:/Forms/AG/Marty’s%20Stuff/Documents%202015-19/Pecan%20Info/Pecans%20Management%20Calendar.html#calendar
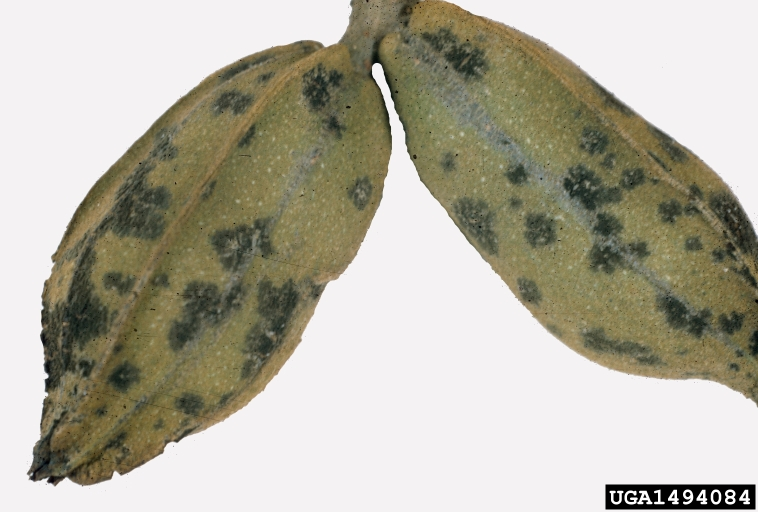
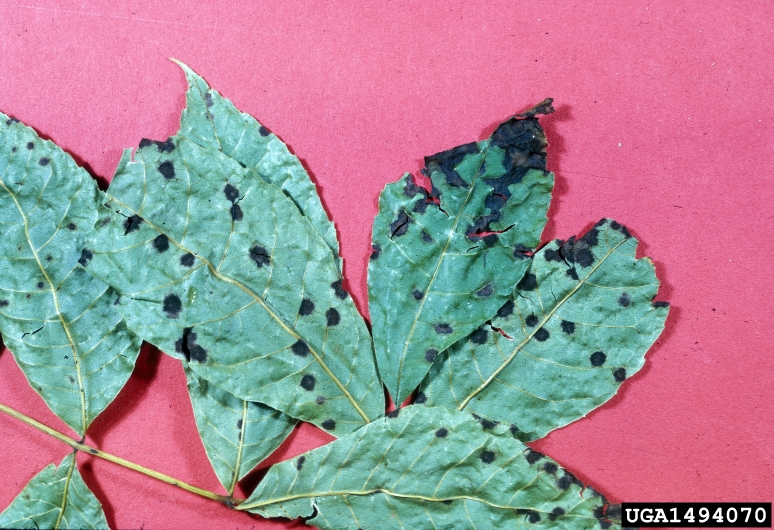
August 6, 2021
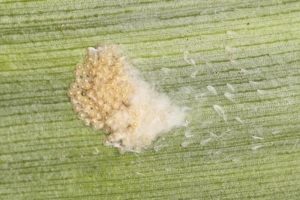 Insect Eggs
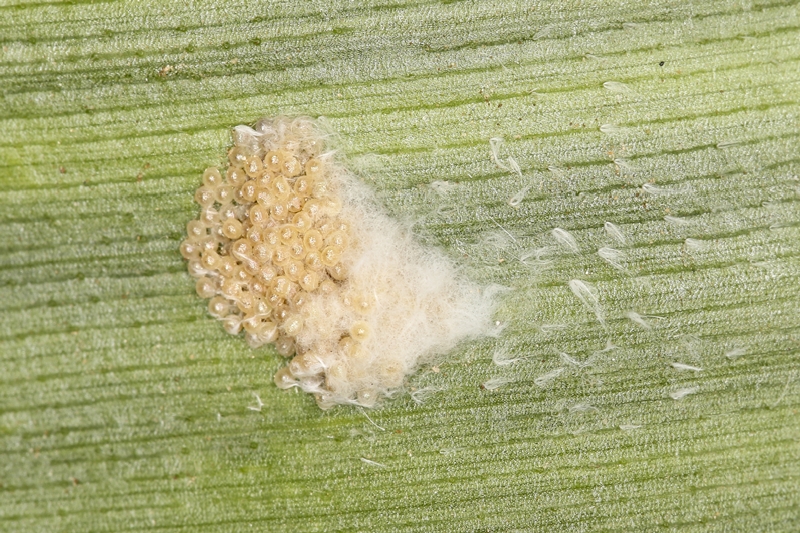
I have received numerous calls and pictures from folks around the County this week of some type of insect eggs attached to just about anything that you can think of from lights, tires, outdoor furniture, pretty much anything outside of the house. There are just thousands, maybe millions of eggs attached to fixtures. What is laying all these eggs? The short answer is “an insect” What kind of insect is a great question and my answer to that is “ I Don’t Know” Was it a moth or butterfly or some other type of insect? You tell me!!!! Some think it’s the Fall Armyworm moths laying these eggs, and it could be, again I don’t know! All insects lay eggs, some lay them on the back side of leaves, some in tree bark, some on the grass, some in or on the soil, and evidently, some on just about anything that’s handy. So your guess is good as mine until the eggs hatch and then we can take a look at the larva when it gets big enough for us to try and identify it. Until then what do we do about the eggs?
Eggs are a tough nut to crack from what I have read. There really is no good scientific information on the subject of destroying them so here are a few ideas just thrown out there. I read that concentrated White Vinegar or 100% pure vinegar will kill spider eggs, so if it will kill these eggs will it kill other insect eggs? I guess the only way to find out is to give it a try. I also heard that mixing salt with the vinegar makes it more likely to kill the eggs and if you make it a hot solution then that’s even better. Another idea I had and is by no means scientific is this, if its outside on lawn furniture use a power washer to wash the eggs off the furniture or whatever they are attached too. With high pressure spraying it should penetrate the eggs and destroy them, at least one would think so. At least you will get your furniture clean. If you have any magic bullets please let me know. This is not a problem we are faced with every year but the weather pattern in 2021 has made for some unusual happenings.
Here is some great websites for insect identification from our agency and others.
Field Guide to Common Texas Insects: https://texasinsects.tamu.edu/
Insect Identification– There are over 1 million identified species of insects and spiders in the world with many more still awaiting discovery. Visit this great website to learn more about Moths, Caterpillars, Butterflies, Beetles and Spiders.
https://www.insectidentification.org/
Complications with Controlling Insect Eggs, Interesting but take it for what it’s worth: https://www.intechopen.com/chapters/49557
July 27, 2021
 How to Clear Up a Stock Tank or Pond
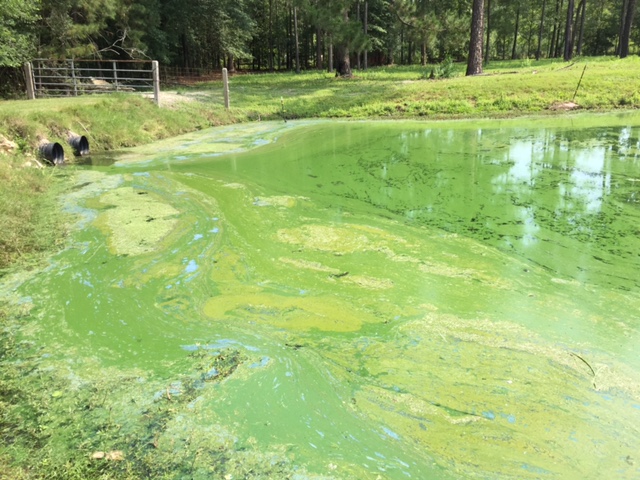
AQUAPLANT is an informative Texas A&M AgriLife Extension Aquatic website. Check out the different types of pond weeds, Algae and Herbicide charts with products and their effectiveness. Along with lots of other great researched based information our agency has on the subject. https://aquaplant.tamu.edu/
Products with Fluridone is going to work the best controlling all pond weeds . Allegare-fluridone_label
One I like best is Wipe Out-label is attached. It can be applied in a single application to the entire pond without worrying about fish kill and it has no restrictions on temperature, swimming, boating or livestock. One and done. Airmax-Wipeout-product-label
There are some other products too like Rodeo, Eraser, both glyphosates and then there is Reward and Habitat Herbicides, but you have to treat a quarter to a third of the pond every two weeks to keep from killing your fish from oxygen depletion. In other words treat a quarter of your pond now and two weeks later do another quarter.
There are several products with 2,4-D but I don’t like to use them in ponds, but if you want to use one I would recommend Aquacide Pellets, treat a quarter to a third of the pond every two weeks to keep from killing your fish from oxygen depletion. https://www.killlakeweeds.com/products/aquacide-pellets?gclid=Cj0KCQjw3f6HBhDHARIsAD_i3D-wU6uPOC5dIuhPoR06P7o7Am-V0Dveq25VQznESJ8XzA98_yOUGGkaAuVMEALw_wcB
July 13, 2021
 Got Fall Armyworms?
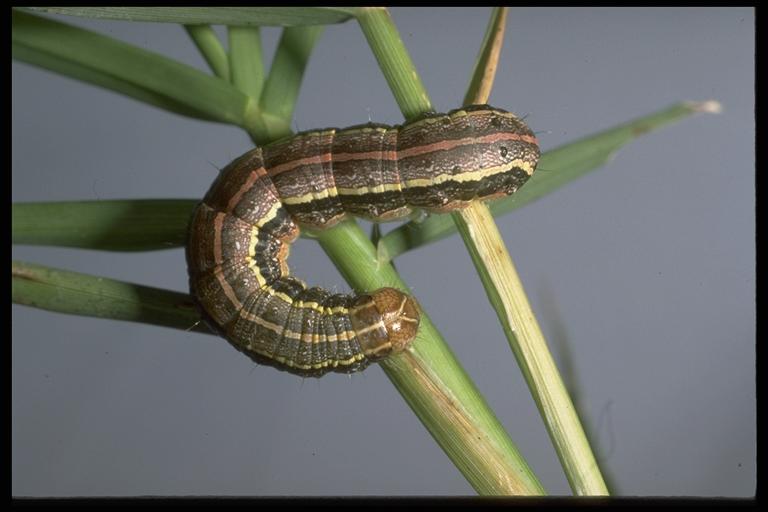
Guess who is here early this year? Yep you guessed it, our ole dependable enemy the Fall Armyworm has been reported in Wise County and parts of North Texas. I have been hearing reports the last couple of weeks about them in Central and East Texas so I figured it wouldn’t be long until they made their way to Wise County. A few weeks ago the grasshoppers were a dime a dozen, now Armyworms and Hoppers. It’s always something hounding us farmers and ranchers. The weather conditions have been somewhat strange this year and it has been prime for all insects especially grasshoppers and now Fall Armyworms, and every other type of insect known to man. The mosquitos are bad this year and huge, the Ticks are bad in places also. Walnut Caterpillars have been a problem this year with huge populations out there this spring. I have assembled great information on identifying, controlling and choice of products available, so check it out. Remember to identify a Fall Armyworm they will have the inverted Y on their heads and three yellow stripes down their back. If they don’t have that inverted Y then they are True Armyworms and they don’t usually pose as big a problem for our forages. Anyway, here in my toolbox this week I some great information for you to help control and eliminate the little grass hogs. Stay on top of it as they can wipe you out overnight seems like. And get your product out early in the worms life cycle, from pre-hatch to half inch long is best for most products but some does have longer acting control for any stage. That means get out in the grass and look for them on a daily basis if possible so you can detect them early. Small fall armyworms are much easier to kill than larger ones. A population of 3 to 4 or more fall armyworms per square foot is a reasonable treatment threshold. Insecticides vary in price; grazing and harvesting intervals; mode of action; speed of action; and safety to the environment and to the applicator. The insecticide label usually recommends a range of application rates. In general, use higher rates of insecticides (and higher volumes of water) when the grass is thick, when fall armyworm populations are high, when caterpillars are large, and to get the longest residual effect. Some insecticides will kill only smaller caterpillars, so check the comments about each insecticide. Pay close attention to the number of times a particular insecticide can be applied per hay cutting and per season. Within a season, rotate between different modes of action, if possible. I am talking mainly pastures and hayfields here, but they can get in your lawn too so you homeowners beware! Holler if you need some help, that’s what I am here for.
Products for Pasture or Hay field application: See the our publication – Armyworm Fact Sheet, for a list of products available to use, and restrictions. Page 3
Products for Homeowners on Lawns-See our Publication Weed, Insect and Disease control in Turfgrasses, for a list of products to use, use rates and restrictions. Pages 58-60
As I ALWAYS PREACH: Read and follow label directions – the label is the law!
Field Guide to Common Texas Insects Fall Armyworm
Fall-armyworm-identification-and-control
Management of Fall Armyworm in Pastures and Hayfields
Weed, Insect and Disease control in Turfgrass
July 7, 2021
What is total coliform bacteria and can I continue to drink my water?

Understanding Your Water Test Report
Wells-what_to_do_if_coliform_bacteria_is_present_in_a_well_water_s
What-to-do-about-coliform-in-well-water
July 1, 2021
 Grassbur Information
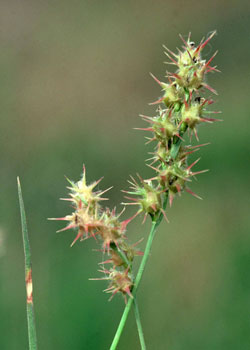
I have received numerous calls and emails the last week or two with questions regarding what to do about the grassbur infestation this year mainly in pastures, but lawns as well. Well the short answer is you missed the boat this year! But it might not be too late to use a product like Dimension to get any stragglers that germinate late. Here is some great information so you can plan ahead to hopefully help control them next year. Controlling them in pastures and hayfields all starts next February to mid-March 2022, by applying a good pre-emergent(lawns a little later, say mid-March to April 1). Please check out my article here that hits on all methods, directions and products available to us. Hopefully this will answer a lot of questions for you and if not give me a shout and we’ll talk about it.
Do You Have Grassburs in Your Lawn
Got Grassburs in Your Pasture or Hayfield
Controlling Field Sandbur (Grassbur) in Turfgrass
Sandbur control in bermudagrass-pastures
June 24, 2021
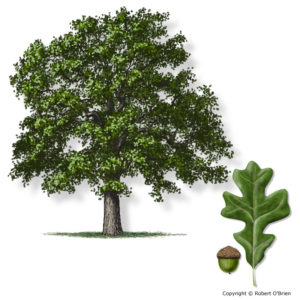 Tree Problems
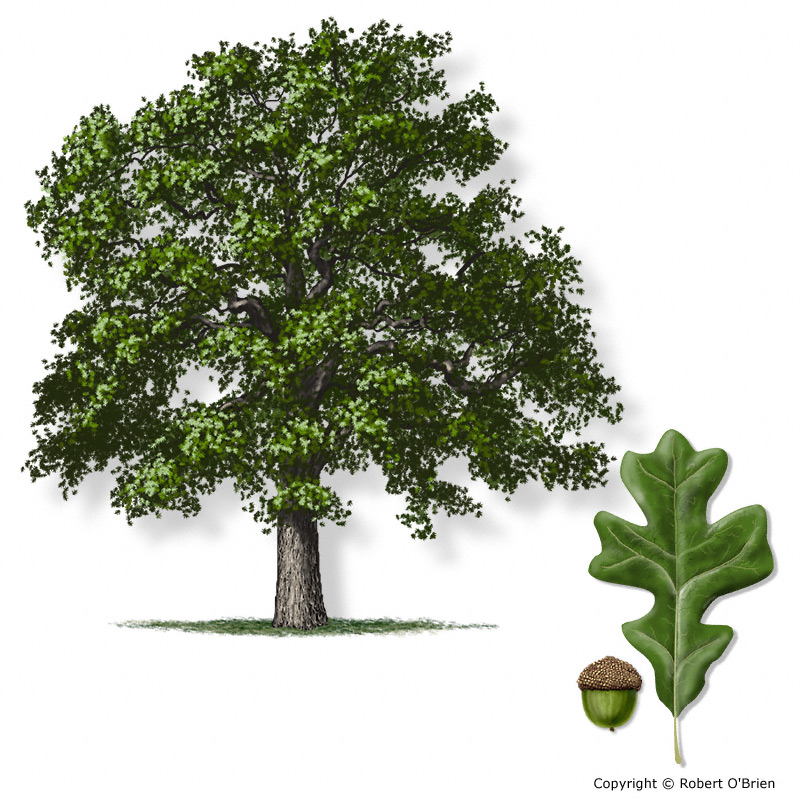
Watch for Pythium and Phytophthora Problems
Phytophthora Root Rot of Trees and Shrubs
My Tree Looks Bad, What is Going On
plantdiseasehandbook.tamu.edu-Cotton Root Rot
Rapid-Decline-of-Post-Oaks-in-Texas
ArborSystems for Tree injection solutions https://www.arborsystems.com/
Forestry Distributing https://www.forestrydistributing.com/wedgle-direct-inject-arbor-systems
June 15, 2021
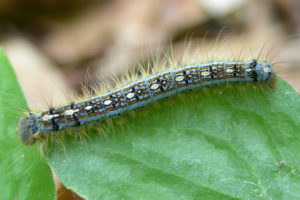 Controlling Caterpillars and Grasshoppers
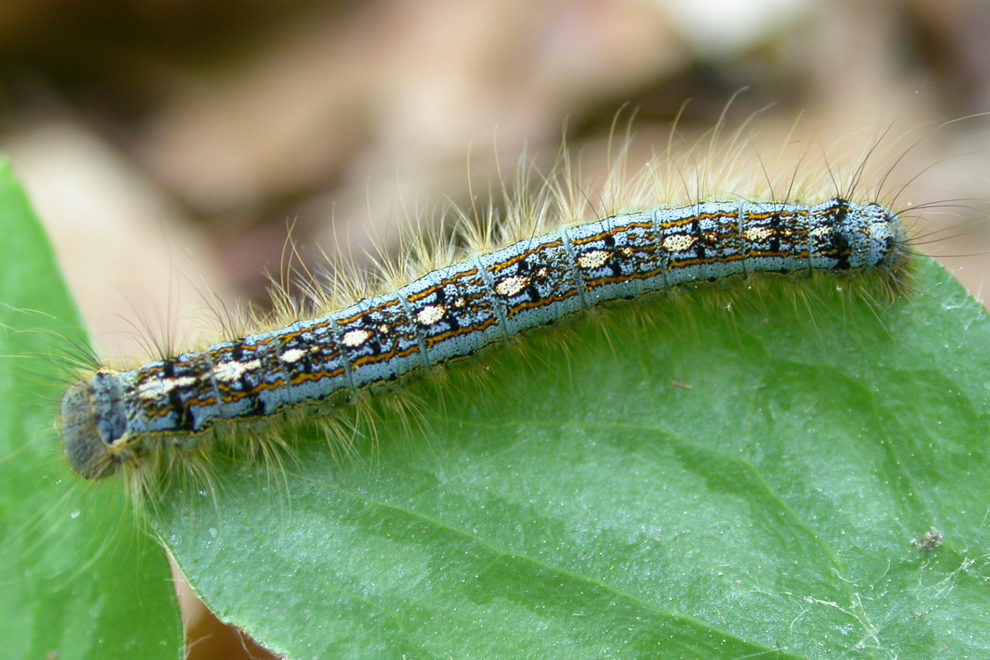
Chewing Insects that can do a lot of damage if not controlled.
Controlling Tent Caterpillars
https://agrilifeextension.tamu.edu/library/gardening/tent-caterpillars/
Controlling the Walnut Caterpillars
https://agrilifeextension.tamu.edu/library/landscaping/walnut-caterpillars/
Controlling Grasshoppers
- In the Lawn – Check out “Insects in the City” at https://citybugs.tamu.edu/factsheets/landscape/lawns/ent-1005/
- In the Pasture –Managing-Insect-Pests-of-Texas-Forage-Crops-PDF
Controlling Grasshoppers in the Pasture and Field -PDF
Controlling the Walnut-caterpillar – PDF
Managing-Insect-Pests-of-Texas-Forage-Crops-PDF
Grasshopper Biology & Control – PDF
Controlling the Fall-Webworm- PDF
June 2, 2021
Grazing and Record keeping for Beginning Producers. Free online courses that lead students through understanding and thinking about grazing for their farm or ranch.
https://natglc-courses.thinkific.com/
May 28, 2021
Wild pig toxicant update and comparison video:
May 21, 2021
Grazing and Record keeping for Beginning Producers. Free online courses that lead students through understanding and thinking about grazing for their farm or ranch.
https://natglc-courses.thinkific.com/
National Grazing Lands Coalition (NatGLC) is dedicated to providing voluntarily ecologically and economically sound management of all grazing lands for their adaptive uses and multiple benefits to the environment and society through science-based technical assistance, research and education.